EMPLOYEE MASTER
Headline text
Main Page > Application Development Team > System Manual > SPGC EPAYROLL
Navigating to Employee Master
I.EMPLOYEE MASTER
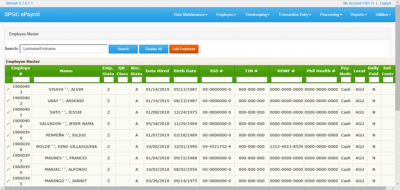
1.Employee Master: Module that will display all employees that are included in company’s master list. It will only shows employees under the location and cost center access of the user of the system.
1.Search Field: Through this field, users can search employees on the system by the use of employee number of employee’s name.
2.Display All: This module allows you to Display all the employee master
3.Add Employee: Module that will allow user to create employees on the system.
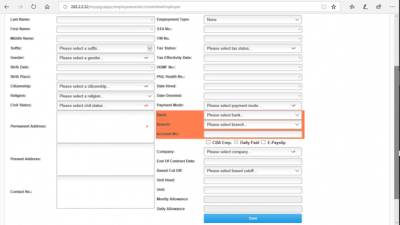
1.Employment Type: There are 2 types of employment type – None and Without Government. You may select Without Government if the employee doesn’t have any government IDs. Note that is only applicable on selected companies.
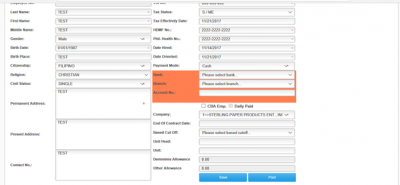
2.Payment Mode: There are 3 types of payment mode, ATM, Cash and Paycard. Once you select ATM, fields such as Bank, Branch and Account Number will be required. Same as on Paycard. While when you chose Cash, those fields will not be required.
3.CBA Emp.: This field is use to identify Union Members. Once you click this, there will be deductions on the salary of employee for Union Dues.
4.Based Cut-Off: This fields will be used on identifying the system approach for specific employee in Timekeeping.
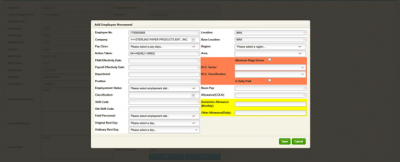
1.Employee Number: A system-generated unique ID which is assigned on an employee. 2.Pay Class: This will determine what will be the pay class of an employee. Monthly employees will get their salary on 4th and 19th of the month. While the weekly employees will receive their salary every Saturday of the week. 3.Action Taken: This will identify which type of movement the user will create. 4.PAM Effectivity Date: The effectivity date that is shown on the actual Personal Action Memo. 5.Payroll Effectivity Date: This is the effectivity date of the created movement. 6.Shift Code: This will determine what the work schedule of an employee is. 7.Field Personnel: This will be the basis on paying for the employee’s overtime. 8.Minimum Wage Earner: If you check this, the system will require the user to fill up the W.O Sector and W.O Classification. 9.Daily Paid: Once the user check this, the employee’s Basic Pay that is encoded on the system will be his daily pay. Note that this field can only be checked if the Pay Class of the employee is Weekly.
II.CONFIRM SEPARATE EMPLOYEE
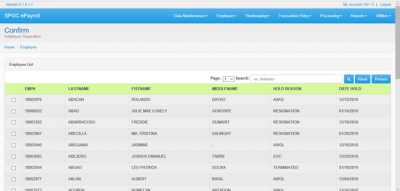
1.Confirm Separate Employee: In this module you can review who’s employee will Resigned, AWOL, Terminate or EOC. And the user can remove the employee in the system.
1.Search Field: Through this field, users can search employees on the system by the use of employee number of employee’s name.
2.Reset: This module reset the Search field history.
III.SEPARATE EMPLOYEE
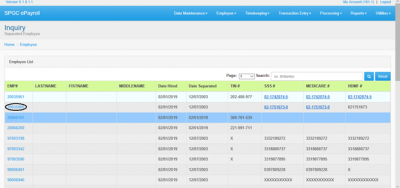
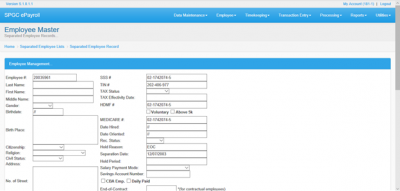
1.Separate Employee: In this module the user can view the information of a employee.
1.Search Field: Through this field, users can search employees on the system by the use of employee number of employee’s name.
2.Reset: This module reset the Search field history.
IV.REMOTE EE CREATION NQUIRY AND RECORD POSTING
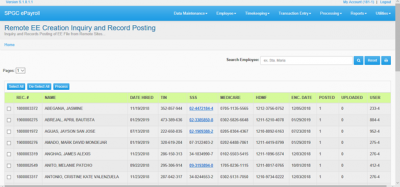
1.Remote EE Creation Inquiry and Record Posting: In this module the user can
View all the pending record of employee.
1.Search Field: Through this field, users can search employees on the system by the use of employee number of employee’s name.
2.Reset: This module reset the Search field history.
V.PERSONAL ACTION MEMO
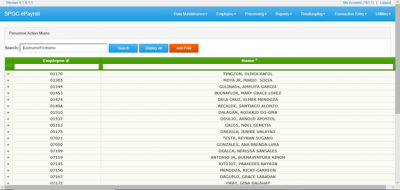
1.Personnel Action Memo: In this module the user can select a employee record who want to print or copy the records.
1.Search Field: Through this field, users can search employees on the system by the use of  employee number of employee’s name.
2.Display All: This module allows you to Display all the employee records.
3.Add PAM: Module that user can print the record of a employee.
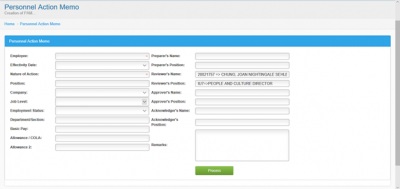
1.Employee: Thought this field the user can select the name of employee.
2.Effective Date: The effective date of employee.
3.Nature of action: This module contains the nature of action of employee.
4.Position: This module contains the position of employee.
5.Company: Contains the company of the employee.
6.Job level: The job level of the employee.
7.Employment Status: Contains the status of employee.
8.Department Section: Contains the section of the employee
9.Preparer’s Name: This module contains the name who’s prepared this.
10.Preparer’s Position: Module contains the position of who’s prepared this.
11.Reviewer’s Name: This module contains the Reviewer of this record.
12.Reviewer’s Position: It contains the position of reviewer of this record.
13.Approver’s Name:  It contains the name of the approver’s of this record.
14.Approver’s Position: It contains the position of the approver’s of this record.
15.Acknowledger’s Name: Contains the name of the employee who create this PAM.
16.Acknowledger’s Position: Contains the position of the employee who create this PAM.
17.Remarks: Contains the remark of a employee.

