TIMEKEEPING - OFFSITE
Main Page > Application Development Team > System Manual > SPGC EPAYROLL
II. Transaction Entry
 Monthly Timekeeping
 Options
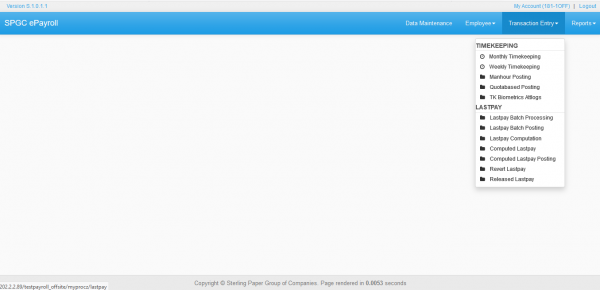
 •Monthly Timekeeping: Module that will display the Monthly Timekeeping records of the employees.
 •Weekly Time Keeping: Module that will display the Weekly Timekeeping records of the employees.
 •ManHour Posting: Module that allows the user to store the processed manhour into the database.
 •TK Biometrics Attlogs: Module that allows the user to upload the biometric logs of the employees in the form of log file.
Figure 2.0
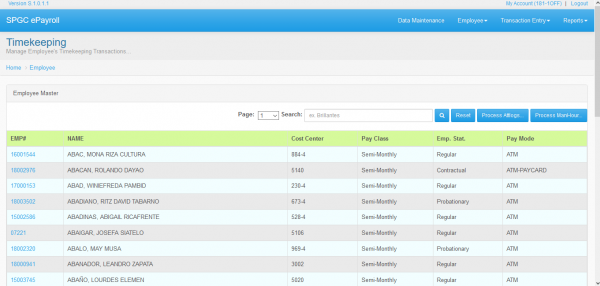
 Once you click Monthly Timekeeping, it will show table showing all the basic details of every employees. You may see figure 2.1 for your reference.
  1.Search Field: Through this field, users can search employees on the system using employee number or employee’s name.
  2.Employee Details: Table showing all the basic information of every employees. The employees displayed will based on user’s access.
If you want to search the information of employee, just type the employee number or name of an employee and click the Search button.
Figure 2.1
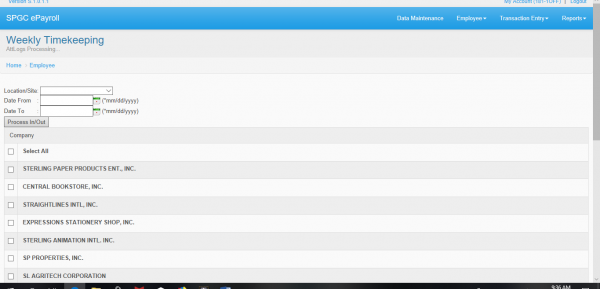
 Process Attlogs – Upon clicking Process Attlogs, this page will show up. I
  1.Choose location or site
  2.Select the duration of date
  3.Select the company
Figure 2.2
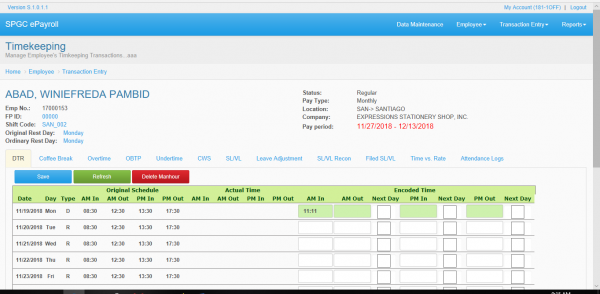
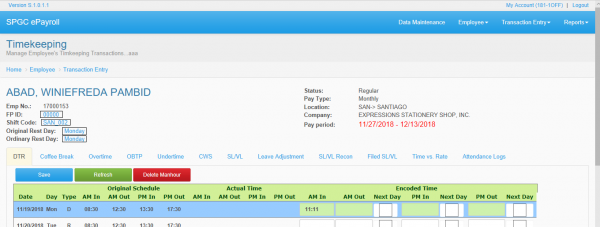
Once you click the Employee Number of the employee you will be redirected to another page. This page contains the some of the information of the employee and the Timekeeping record of the employee. You may see figure 2.3 for your reference.
Figure 2.3
The user can edit the TK details info by clicking the boxed modules. You may see figure 3.0 for your reference.
                                                     Figure 2.4
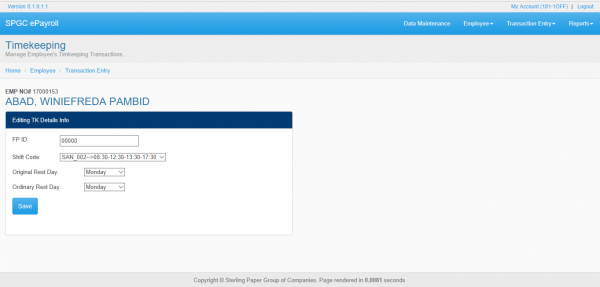
 Upon clicking the TK details info, you will rediredted to another page. You can be able to edit the TK info of the employee. After clicking the save button the changes will be saved.
Figure 2.5
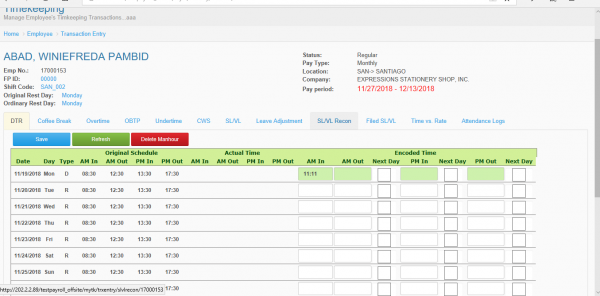
 DTR
 This form shows the DTR of the employee.
  1.Original Schedule - it is the original working schedule of the employee.
  2.Actual time - it is based on when he/she started and when he/she finished his/her job.
  3.Encoded Time - it can be edited by the HR for some reasons.
Note* the time in columns that has a green background can be edited by the HR.
After clicking the Save button the changes that you’ve made will be save. Clicking Refresh button will enable you to refresh the page. Upon clicking Delete Manhour button the manhour record of the employee will be deleted.
Figure 2.6
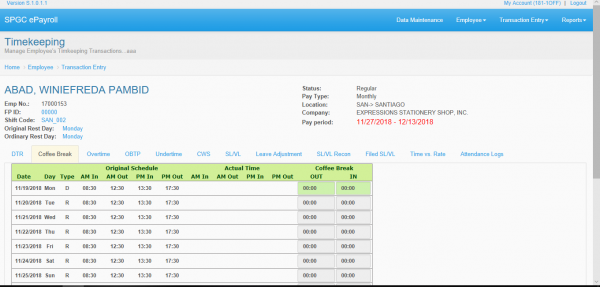
 COFFEE BREAK
  1.Original Schedule - it is the original working schedule of the employee.
  2.Actual time - it is based on when he/she started and when he/she finished his/her job.
  3.Coffee Break - The range of time used by the employee in his/her coffee break.
In this form the user can be able to know if the employee have a coffee break. Also in this page the user can monitor the time used by the employee in his/her coffee break.
Figure 2.7
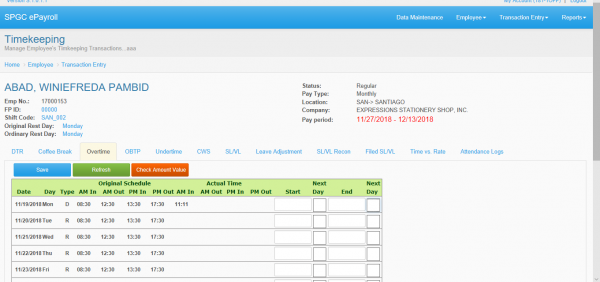
 OVERTIME
  1.Original Schedule - it is the original working schedule of the employee.
  2.Actual time - it is based on when he/she started and when he/she finished his/her job.
  3.Start - The user can indicate when the employee started his/her overtime.
  4.End - The user can indicate when the employee Ended his/her overtime.
The overtime of the employee will be inputted in the Start and End column that is placed within the right corner of the page. In start you have to indicate when the OT of the employee began and, in the End, you have to indicate the time when the OT has ended.
After clicking the Save button the changes that you’ve made will be save. Clicking Refresh button will enable you to refresh the page. Upon clicking Check Amount Value button the user can be able to see the overtime record of the employee.
Figure 2.8
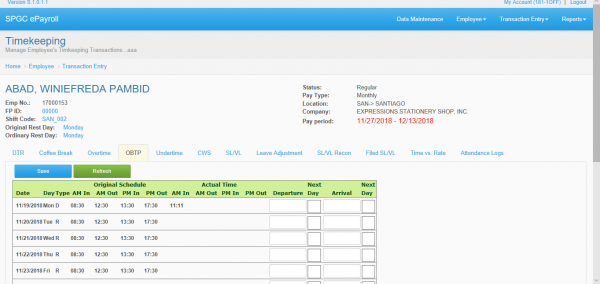
 OBTP (Official Business Trip Pass)
  1.	Original Schedule - it is the original working schedule of the employee.
  2.	Actual time - it is based on when he/she started and when he/she finished his/her job.
  3.	Departure – this module holds the departure time of the employee for his/her OBTP.
  4.	Arrival – This module holds the time when the employee returned from his/her OBTP.
You may see figure 2.9 for your reference. After clicking the Save button the changes that you’ve made will be save. Clicking Refresh button will enable you to refresh the page.
Figure 2.9
