Difference between revisions of "POS USER'S MANUAL"
| Line 279: | Line 279: | ||
''Wait until the installation is done. It may take few minutes based on your computer performance. When it is done, you can run the application and use it.'' | ''Wait until the installation is done. It may take few minutes based on your computer performance. When it is done, you can run the application and use it.'' | ||
| − | [[File: | + | [[File:53.JPG|center|400px]] |
'''Bold text''' | '''Bold text''' | ||
Revision as of 14:47, 5 January 2018
* POS INSTALLATION *
* Step 1: Install Maria DB on your PC.
Figure 1. Installing the MariaDB installer.
On figure 1 you will see the installer for iPosWare. Click the installer named mariadb-10.0.21-win32 and run it.
Figure 2. MariaDB 10.0 Setup
On figure 2 will show a confirmation that you want to install the setup. Click Next.
Figure 3. End-User License Agreement
On figure 3, you will see all the terms in the License Agreement. Click I accept the terms in the License Agreement and click Next.
Figure 4. Custom Setup
On figure 4, you will select or change the way features will be installed. In our case, just click Next.
Figure 5. User settings
On figure 5, you will modify password for database user ‘root’. On the new root password and confirm field, type limsehleng then click Next.
Figure 6. Database settings
Figure 6 shows the Instance properties of your database. No need to modify any field just click Next.
Figure 7. Submit usage information
Figure 7 will give you a choice if you want to participate in giving feedback that will be used to improve MariaDB. Click Next.
Figure 8. Ready to install MariaDB
Figure 8 will give you a chance if you want to go back to previous step. If there is nothing to configure, click Install.
Figure 9. Ready to install MariaDB
The figure 9 will show the progress of installation. Wait until finished, then click Next.
Figure 10. Installation completed
Figure 10 is the last step in installing MariaDB. It shows the installation is done, just click Finish.
* Step 1: Step 2: Install SQLyog
Figure 11. Choose Install Location
On figure 11, you will choose the destination folder of the SQLyog. Place it on drive C: and click Install.
Figure 12. Choose Components
You will ask what components you want to install on your computer. Select all and click Next.
Figure 13. License Agreement
On figure 13, you will see all the terms in the License Agreement. Click I accept the terms in the License Agreement and click Next.
Figure 14. SQLyog Setup Wizard
Figure 14 is the welcome page on the setup wizard. Click Next to continue.
Figure 15. Installer Language
You will ask to select what language to use on installation. Select English and click OK.
Figure 16. Installing SQLyog
Wait until the installation is finished and click Next.
Figure 17. Install completed
Figure 17 shows that the installation is done. Click Finish.
Figure 18. Creating a new connection
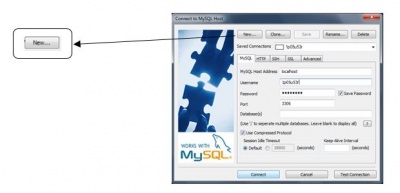
On figure 18, you need to create a new database connection. To create, click New.
Figure 19. Naming the connection
Figure 19 will ask for the name of connection. Just leave as it is and click OK.
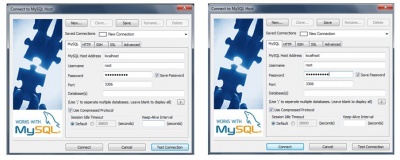
Figure 20. Filling out the password
On this step, you need to fill out the field for password with limsehleng. After filling out the password field, click Connect.
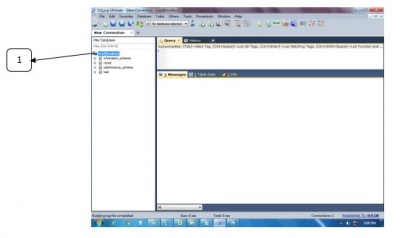
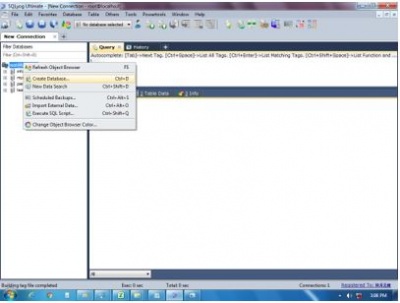
Figure 21. Create your database
Once you are connected, you can now create your database. Right click [1] shown on figure 21.
Figure 22. Create your database (2)
Click Create Database shown on figure 22.
Figure 23. Naming your database
It is important to name your database correctly so that you may not encounter any errors during the system execution. For the database name field, name it as db_iposdata.
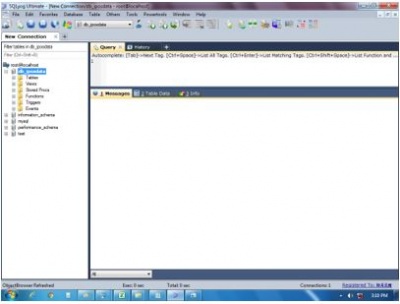
Figure 24. Database successfully created
When the database was successfully created, you will see your database at the left part of the screen. See figure 24 for the actual image.
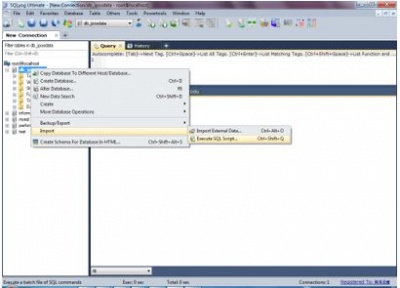
Figure 25. Execute SQL Script
For the database to have all the needed tables at values, you must execute SQL script. To do this, just right click your database and go to import and click Execute SQL Script.
Figure 26. Locating your SQL File
You will be asked to locate where your sql file is located. This may vary on where you place your sql file. In my case, I place it on the desktop. After locating, just click Execute.
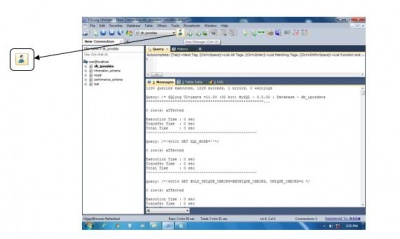
Figure 27. Executing query
After locating your SQL file, wait until the queries are executed. It may take few minutes based on your computer performance.
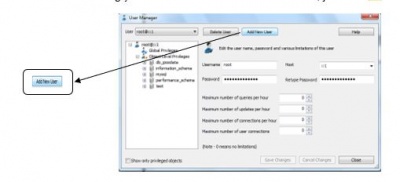
Figure 28. Adding user (1)
The next thing you should do is to add user. To do this, just click the user icon shown on figure 28.
Figure 29. Adding users (2)
Click Add New User shown on figure 29.
Figure 30. Filling out the needed information
Fill out the fields with this following information:
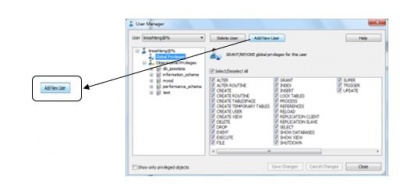
Figure 31. Selecting Privileges
Click Select/Deselect All to configure and click Save Changes.
Figure 32. Adding another user
Click Add User again to add another user.
Figure 33. Filling out the needed information
Fill out the fields with this following information:
Figure 34. Selecting Privileges for another user
Click Select/Deselect All to configure and click Save Changes and close the window.
* Step 3: Copy the required files on drive C:
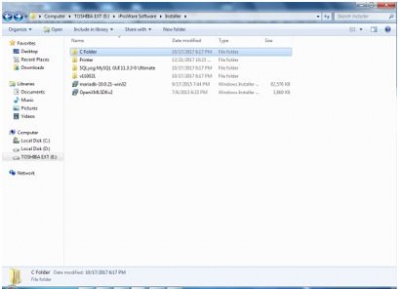
Figure 35. Open the C Folder
There are files that need to be copy on you drive C:, to get them you must open the C Folder.
Figure 36. Copy all files
Copy all files inside the C Folder.
Figure 37. Paste files on your Drive C:
Paste all files that you copied on C Folder on drive C:
* Step 4: Installing the EPSON Printer
Figure 38. Run the EPSON setup
Run the EPSON setup to start installing.
Figure 39. Preparing the setup
Figure 39 shows that EPSON is preparing setup.
Figure 40. Welcome page
After preparing the setup, EPSON will show a welcome page. Click Next.
Figure 41. Selecting the setup type
Choosing for the type of setup is mostly shown when we are installing a software. For our case, just click Standard.
Figure 42. Printer Configuration
On this part, we need to plug in the printer in the Computer so that the software can recognize which printer we are using. Also, on setting up the software, it is a must.
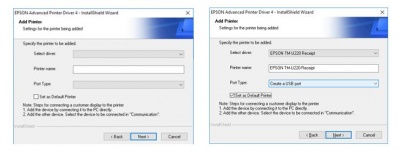
Figure 43. Add printer
On this part, we will ask to select driver and what type of port to be use. For the driver, we will be using EPSON TM-U220 Receipt and for the Port Type, select Create a USB port.
Figure 44. Printer Configuration
After adding a printer, the computer already recognized what printer we will be using. Click Next.
Figure 45. Copying files
The summary of the configuration we made during set up is shown on figure 45. Click Next to continue.
Figure 46. Setup Status
Wait until the installation is done.
Figure 43: Installation complete
The printer is now ready! Lastly, we need to install iPosWare.
* Install the iPosWare
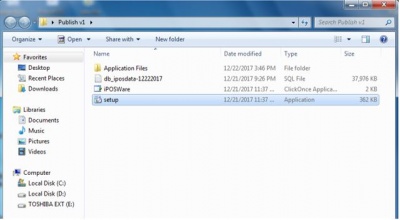
Figure 44: Run the setup
Run the setup application file to start the installation.
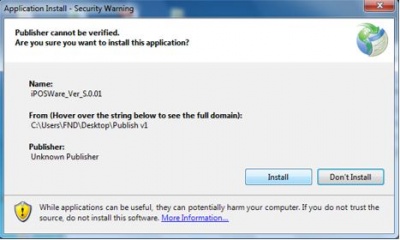
Figure 45: Install the set up
Click Install to start the installation of iPosWare.
Figure 46: iPosWare installing
Wait until the installation is done. It may take few minutes based on your computer performance. When it is done, you can run the application and use it.
Bold text
Italic text
Bold text
Italic text
