Difference between revisions of "DATA MAINTENANCE"
From SPGC Document Wiki
| Line 309: | Line 309: | ||
'''Using Breakdown per Employee''' | '''Using Breakdown per Employee''' | ||
| − | '''*'''Picking Breakdown per | + | '''*'''Picking Breakdown per Employee on the Combo box, In that certain GL Code, and several SDSA codes, it will Sum-up all the expenses of the Employees in the several SDSA codes. |
(ex. Employee1 bought SDSA code1, SDSA code2, and SDSA code3; now that will be all added. Employee1 total purchase = SDSA code1 + SDSA code2 + SDSA code3). | (ex. Employee1 bought SDSA code1, SDSA code2, and SDSA code3; now that will be all added. Employee1 total purchase = SDSA code1 + SDSA code2 + SDSA code3). | ||
Revision as of 11:17, 23 June 2017
Main Page > Application Development Team > System Manual > SPGC EPAYROLL
Navigating to Data Maintenance
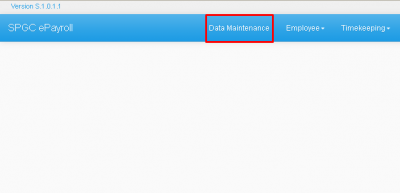
* In the SPGC ePayroll Main page, there on the Nav. bar you will see Data Maintenance, click it.
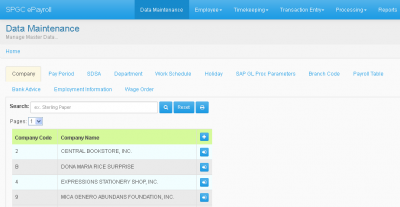
*After clicking it, you will be redirected to, Data Maintenance - Manage Master Data.
* You will see there, in the data maintenance page, are the following: Company, Pay Period, SDSA, Department, Work Schedule, Holiday, SAP GL Proc Parameters, Branch Code, Payroll Table, Bank Advice, Employment Information, Wage Order. Now you may pick your desired option.
Contents
Company
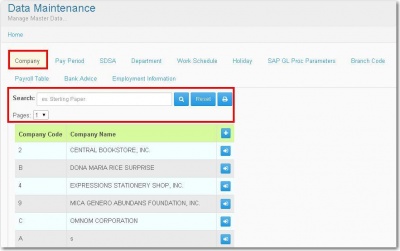
* When the user click on the Data Maintenance which manage the master data. The first button is the company. In this section includes the Company Code and the Company Name. The user can use the combo box for Pages which is the number of pages on the list. Next the user can also use the search box to find the Company of their choice. And the Reset button to go back to the main page of the data maintenance.
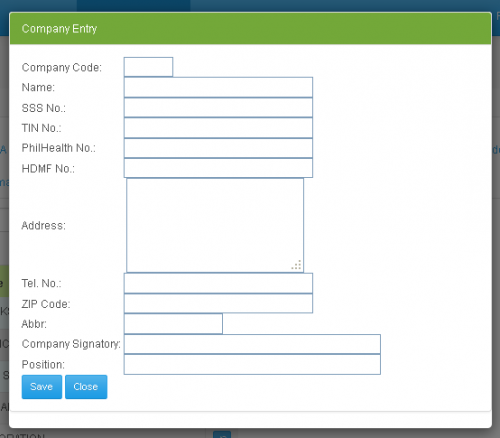
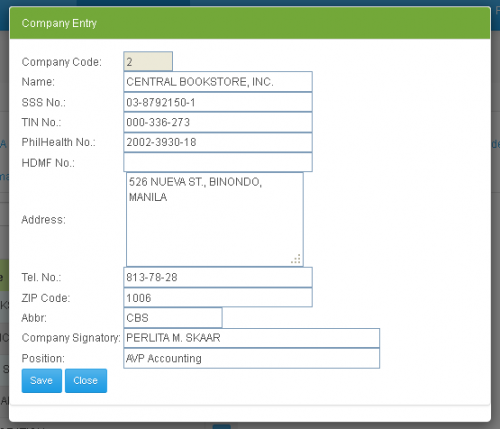
* When the user clicks (+), The Company Entry Form will display. Then the user can input data to the entry which includes the Company Code, Name, Company Signatory,Abbr., etc. This button is use to Add new Company in the system. After that the user can now click on the Save Button then the records will save.
* When the user click (=>]), The Company Entry will display. It will display also the Company code, Name, Abbr, etc. of the company the user selected. Then the user can also edit it's information and after that the user can now click on the Save button.
Pay Period
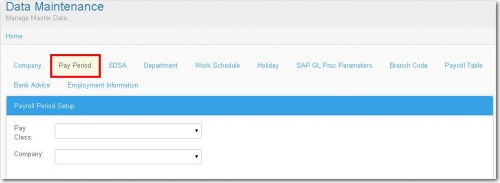
* In the Data Maintenance it includes the Pay Period, When the user clicks it, the Payroll Period Setup will display.
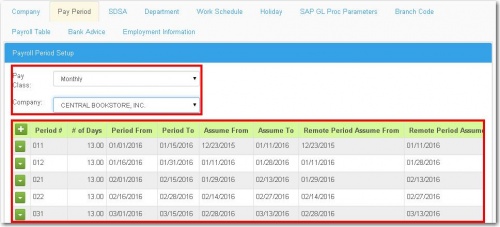
* When the user selects Weekly in the Pay class and selects the desired Company,it will display the Payroll Pay Period, Weekly Pay class of that certain Company.
* When the user selects Monthly in the Pay class and selects the desired Company,it will display the Payroll Pay Period, Monthly Pay class of that certain Company.
* When the user selects VIP in the Pay class and selects the desired Company,it will display the Payroll Pay Period, VIP Pay class of that certain Company.
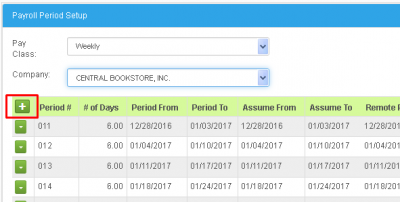
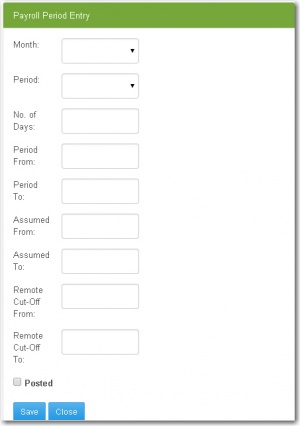
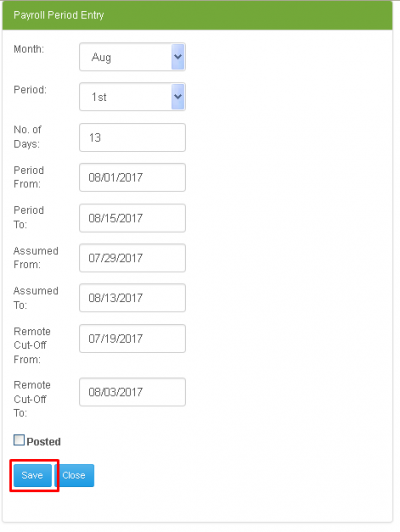
 * When the user click (+), the Payroll Period Entry will display which is the new entry for Payroll Period. The user must input the entry including the Month, Period, No. of Days, Period From, Period to, Assumed From, Assumed to, Remote Cut-off From and Remote Cut-off to.
 After the user input the data on the entry, the user can now click the save button then the new entry will be saved.
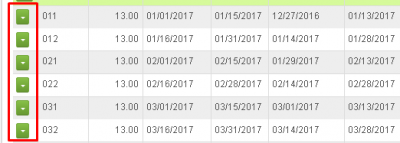
*When the remarks of that Payroll period is Open, you can press the button on the left side of the screen, and there an edit option will appear, press that to edit that certain Payroll Period.
*After Pressing Edit, you may now edit or update that certain Payroll Period, after editing just press the Save button to save the changes you have made.
SDSA
* The SDSA is in the Data Maintenance, Where the user can select a company on the combo box, then the user can also use the search box to Search SDSA. And when the user click the reset button it will go back to the SDSA page.
* When the user selects any company it will display below SDSA codes, Description, Add/ded, Old Gl code, New Gl code available on that certain Company.
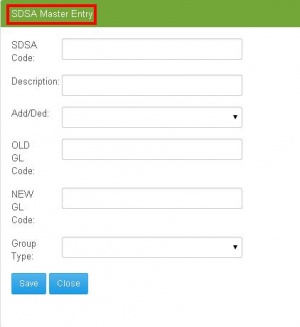
* When the user clicks (+) button, the SDSA Master Entry will display. Then the user must input a data in the entry including the SDSA Code, The Description, Add/Ded which can be select as Addition and Deduction, OLDGL Code, New GL Code and Group Type which can be select as Company, SSS and PIB. Then after the user input a data on the entry, the user now can click the Save button then then the record will save.
Department
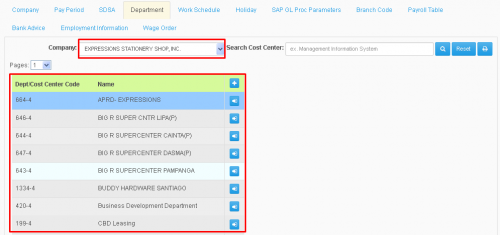
* Under the Data Maintenance is the Department. The user can select a company in the combo box, When selected the desired Company, that certain Company's Dept./Cost Center Codes and Names will appear.
*For specific searches, The User may use the search box to search Dept/Cost Center of that company. The user may also Press the Reset button to go back to the main page of the Department and reset the searches to none.
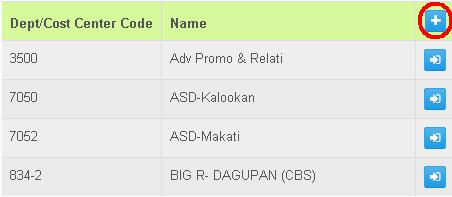
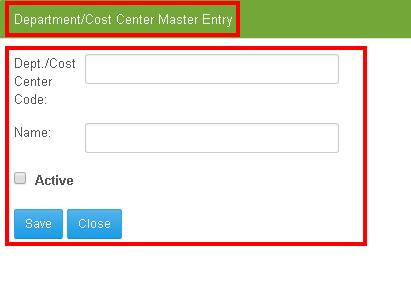
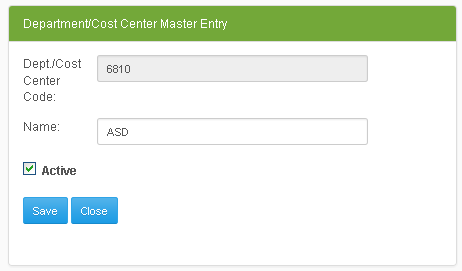
* When the users click (+) button , The Department/Cost Center Master Entry will display. Then the user must input a data on the entry including the Dept./Cost Center Code and Name. Then the user can check the check box for active.
* When the user click (=>]) the entry of the company that the user selected will display. And the user can edit the data of the company and the user can now click the Save button.
Work Schedule
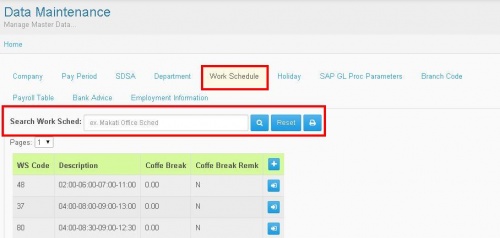
* Under the Data Maintenance is the Work Schedule. The user can use the search box to Search Work Sched. Then the user can also use the pages combo box which is the pages within the list. Then the reset button to go back to the main page of the Work Schedule.
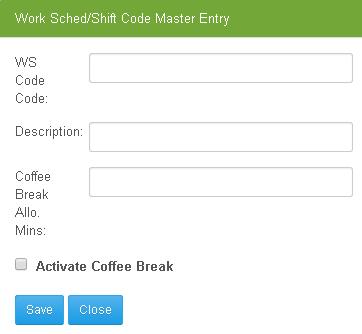
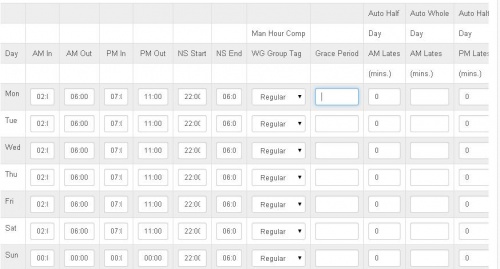
* When the user click(+). The Work Sched/Shift Code Master Entry will display. The user should input a data on the entry including the WS Code Code, Description and Coffee Break Allo. Mins. Then the user can check the check box to Activate Coffee Break.
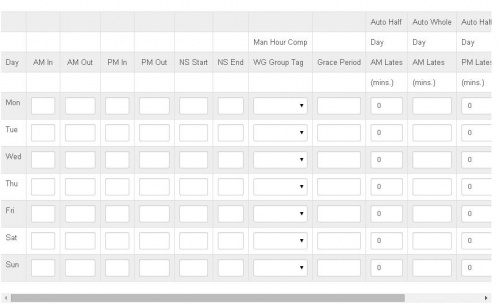
The Blank table will also display. The user should input a data on the entry then it will automatically save the changes when the user clicks the save button.
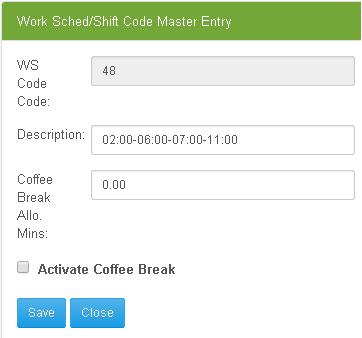
* When the user click (=>]) the entry that the user selected will display. Then the user can edit the data on the entry.
* The table with data will display and the user can edit the entry then the user can now click the save button then the records will save.
Holiday
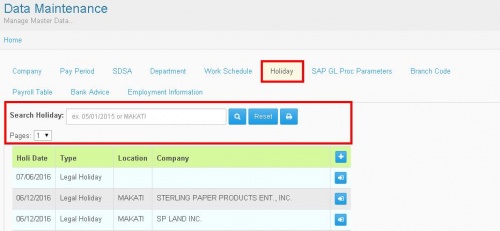
* Under the Data Maintenance is the Holiday. The user can use the search box to search Holiday. Then the Pages Combo Box for number of pages. And the reset button to go back to main page of holiday.
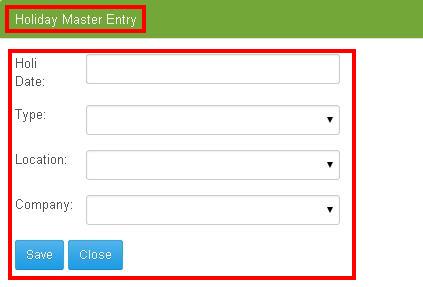
* When the user click (+) The Holiday Master Entry will display. The user should input a data on each entry including the Holi Date, Type, Location and the Company. Then the user can now click on the Save button then data input by the user will save.
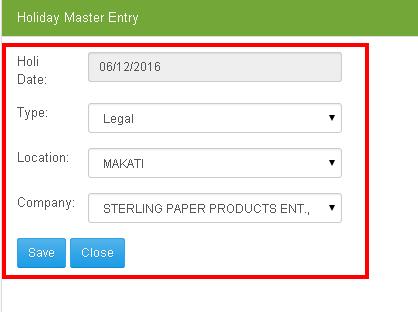
* When the user click (=>]) The entry that the user selected will display then the user can also edit the data on the entry, then after that the user can now click the save button.
SAP GL Proc Parameters
* Under the Data Maintenance is the SAP GL Proc.Parameters. The user can use the seach box to search the company. Then the user ca click the reset button to go back to the main page of the SAP GL Proc. Parameters.
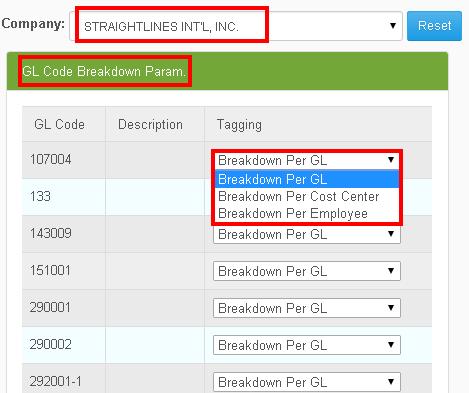
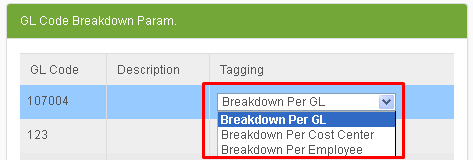
* When the user select any company the GL Code Breakdown Parameters will display. It includes in the Table the GL Code, Description and Tagging which can be selected as Breakdown Per GL, Then Breakdown Per Cost Center and Breakdown Per Employee.
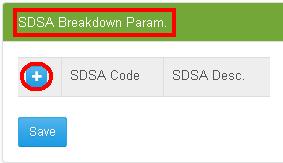
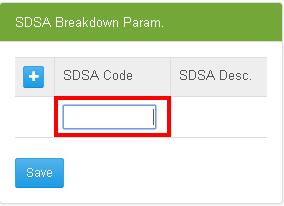
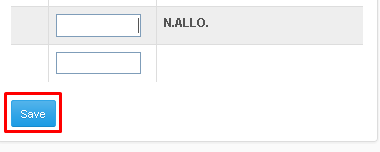
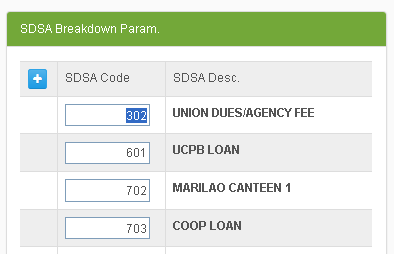
* When the user click(+), It will display a textbox below the SDSA Code. Then the user should input SDSA Code and after that the user can now click the save button then the records will save.
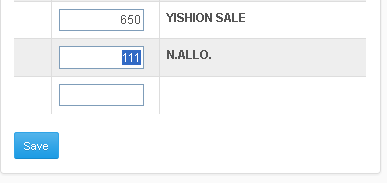
* You may also delete SDSA code by pressing the SDSA code Text box, and erasing the SDSA Code, then press Save now the entire row will be deleted.
Tagging
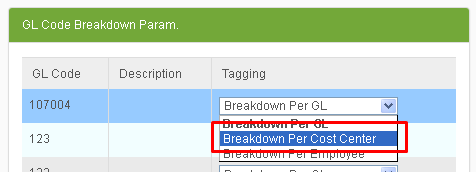
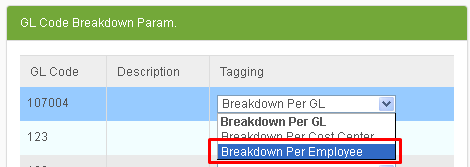
* In the GL Code Breakdown Param., you will see a Tagging column, in that column, you will see a combo box containing; Breakdown per GL, Breakdown per Cost Center, Breakdown per Employee.
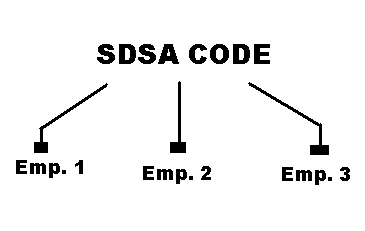
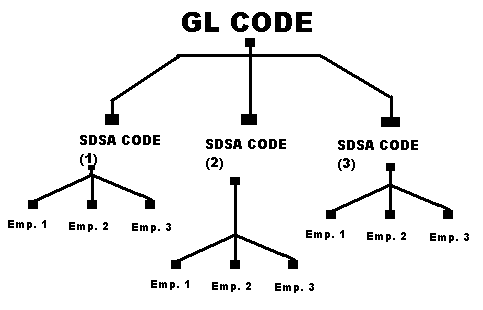
*In one SDSA code contains several Employees transacted with that code.
*An SDSA code represents a Product to be transacted from, ex.( SDSA code is "1234" - RICE), which means when an employee transacted with SDSA code = "1234", that employee bought rice. That is why in one SDSA code it could contain several employees, because several employees bought rice.
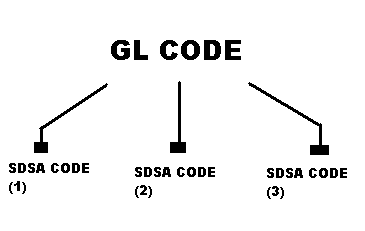
*Now in one GL code, contains several SDSA Codes.
*Now in one Company Contains different GL Codes.
*Now that you know the Structure of the codes, you will now proceed with the function of Breakdown per Gl, Breakdown per Cost Center, Breakdown per Employee.
Using Breakdown per GL
*In the GL code Breakdown Param., you will see the different GL codes of the Company of your choice, now look for the desired GL code, now that you have found the GL code, look at the Tagging column of that GL code, You will now see a Combo box press that and you will see choices that are: Breakdown per GL, Breakdown per Cost Center, Breakdown per Employee.
*Pick Breakdown per GL, now that will total out all the amount contained in that GL code. (Remember that in one GL code contains several SDSA code, and in one SDSA code, contains several employees who transacted with that SDSA code.)
*Now all the Amount in the SDSA codes in that certain GL code will be Added, Summed-up and will be displayed in the data.
*If in the Summed-up displayed data is incomplete, check what SDSA code made it incomplete, and remove it from the SDSA Breakdown param.
Using Breakdown per Cost Center
*Picking Breakdown per Cost Center on the Combo box, In that certain GL Code, and several SDSA codes with different employees, those different employees will be arranged depending on their Cost Center, now that they are arranged, all the amount on the same Cost Center will be Added, Summed-up and will be displayed in the data.(ex. Cost Center 1 = total, Cost Center 2 = total, Cost Center 3 = total). Cost Centers are the Dept. where a certain employee is assigned.
Using Breakdown per Employee
 *Picking Breakdown per Employee on the Combo box, In that certain GL Code, and several SDSA codes, it will Sum-up all the expenses of the Employees in the several SDSA codes.
 (ex. Employee1 bought SDSA code1, SDSA code2, and SDSA code3; now that will be all added. Employee1 total purchase = SDSA code1 + SDSA code2 + SDSA code3).
Branch Code
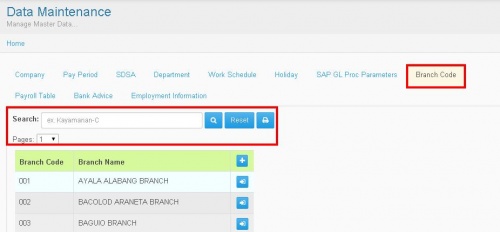
* In Data Maintenance, Branch Code is included. The user can search location on the search box. The user can use the combo box pages which is the number of pages within the data. And the reset button to go back to the main page of the Branch Code.
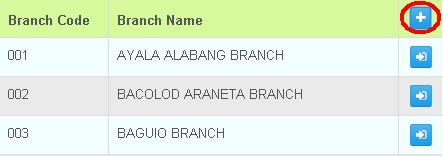
* When the user click (+) The Branch Entry will display which includes the Branch Code and Branch Name. The user should input data on the entry then after that the user can now click the save button.
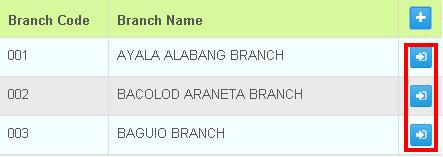
* When the user click (=>]) The entry that the user selected will display and the user can edit the data on the entry and the user can now click the save button to save the records.
Payroll Table
* Under the Data maintenance is the Payroll Table, which includes the Pagibig Table, SSS table and Tax Table.
* When the user click the Pagibig Table, The data content will display. The user can search data on the search box. Then the reset button to go back to the main page of Payroll Period.
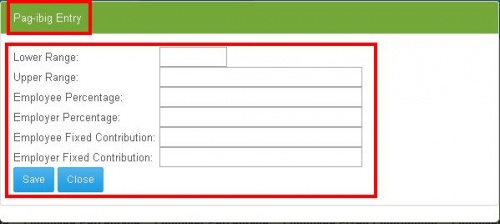
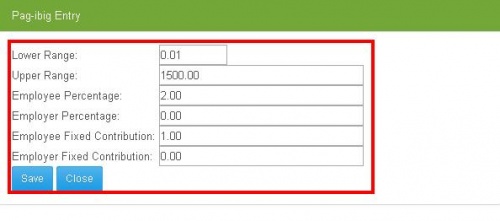
* When the user click (+) it will display the Pagibig Entry. The user should input a data to each entry including the Lower Range, Upper Range, Employee Percentage, Employer Percentage, Employee Fixed Contribution and Employer Fixed Contribution then after that the user can now click the Save button.
* When the user click (=>]) The Pagibig Entry of the data selected by the user will display. Then the user can edit each entry and the user can now click the Save button.
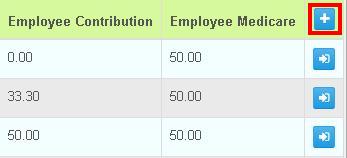
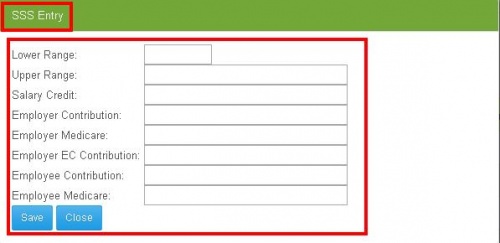
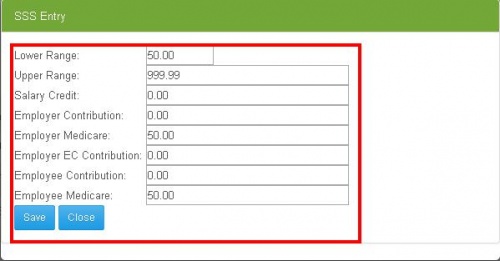
* Under the Payroll Table is the SSS table. When the user click (+) it will display the SSS Entry which the user should input data including the Level Range, Upper Range, Salary Credit, Employer Contribution, Employer Medicare, Employer EC Contribution, Employee Contribution and Employee Medicare. Then the user can now click the Save button.
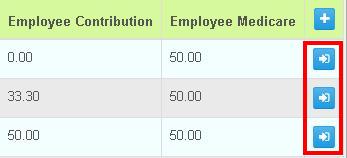
* When the user click (=>]) the SSS entry that the user selected will display, then the user can editand after that the user now can click the save button to Savethe record.
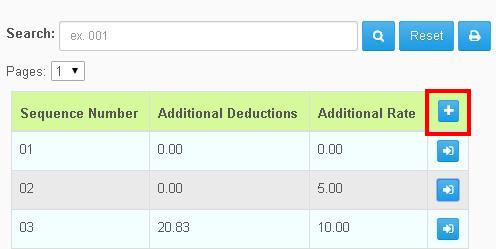
* Under the Payroll Table is the Tax Table. Then it's classified as Tax Additional Rate and Annual Tax Table. When the user click (+) The Deduction and Rate Table will display. The user should input data including the Sequence Number, Additional Deduction, and Rate. After that the user can now click the Save button to save the data.
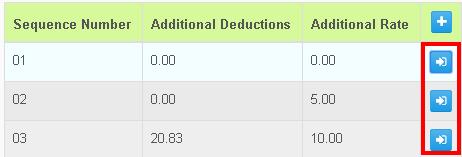
* When the user click (=>]) the entry that the user selected will display. Then the user can edit some entry and the user can now click the Save button.
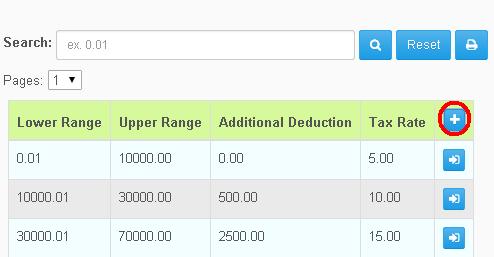
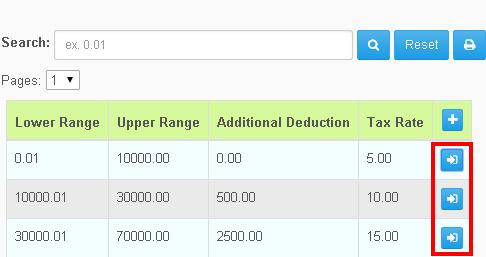
* Under the Tax Table is the Annual Tax Table. The difference of it between the Tax Additional, the Annual is classified as Lower Range, Upper Range, Additional Deduction and Tax Rate. When the user click the (+) same procedure as Tax Additional.
* When the user click (=>]) The Entry that the user selected will display and same procedure as Tax Additional.. Then the user now can click the Save button.
Reference
Main Page > Application Development Team > System Manual > SPGC EPAYROLL
