Difference between revisions of "ROUNDCUBE USER'S GUIDE"
(→Roundcube User's Guide) |
(→Settings – Folders) |
||
| Line 93: | Line 93: | ||
:::::<p>'''>''' It will be placed in the <span style=color:blue>'''Inbox'''</span> and viewing will be emails in list mode </p> | :::::<p>'''>''' It will be placed in the <span style=color:blue>'''Inbox'''</span> and viewing will be emails in list mode </p> | ||
:::::<p>'''>''' Click <span style=color:green>'''Save'''</span> to validate the creation. </p> | :::::<p>'''>''' Click <span style=color:green>'''Save'''</span> to validate the creation. </p> | ||
| + | '''Edit – Delete Folder''' | ||
| + | [[File:16 - Edit - Deleted Folder.JPG|500px|center]] | ||
| + | :::::<p>'''>''' To proceed with the <span style=color:red>'''removal'''</span>, select your folder and click the gear at the bottom of page. You can either: <span style=color:red>'''delete'''</span> the folder or <span style=color:red>'''empty'''</span> the folder. You can also see <span style=color:red>'''storage space'''</span> usage (in percentage). </p> | ||
| + | :::::<p>'''>''' To <span style=color:blue>'''change the folder'''</span>, simply click on the relevant folder. You can then change the <span style=color:blue>'''folder name'''</span>, the <span style=color:blue>'''parent folder'''</span>, the <span style=color:blue>'''display type'''</span> and can '''see''' the number of messages and the present size by the emails in the selected folder. Link "'''Click for file size'''" allows for the calculation of the size of these e-mails (when the number is greater than 0). </p> | ||
| + | ==== '''Settings – Identity''' ==== | ||
| + | '''Create Folder''' | ||
| + | [[File:17_-_Create_Signature.JPG|500px|center]] | ||
Revision as of 13:35, 29 November 2016
Main Page > Application Development Team > System Manual > Roundcube User's Guide
Contents
Roundcube User's Guide
Connect to the Interface
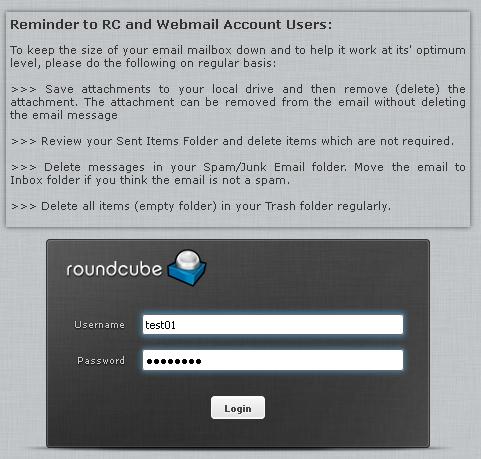
> Enter in your username and password and click on “Login”
Inbox
> Once connected to your account, you have access to your inbox and sent messages. In the left column you can find the main folder of your account: message sent and received
> In the same column under footer, are access to folder settings and Quota of your account
> In the right part, you can easily view all the emails and see the following information
- The subject
- The mark
- The read or unread message status
- The date and time
- The size of the email
- The flag
- The presence of attachments (column with paper clip far night)
| NOTE: By default, some columns do not appear. This is the case of the priorities assign to e-mails. To change this, you must change the display with the option shown below |
Display Option and Sorting
> To access this option, click on the gear icon on the top left side of the main frame of your e-mails, to the left of subject
> In this option, you’ll be able to :
- Add Columns to display (priority mails, etc.).
- Select the columns on which the sort will be done by default.
- Select the sort order (ascending or descending).
> Once you have made your selections, confirm by clicking “Save”
Email Options
> The number of unread emails appears in the left column to the right box of inbox
> An unread email appears bold on the right side
> For each message you can:
- Reply: allows you to reply directly to
- Reply all: allows you to directly response to all emails on the “To” and “Copy”
- Forward: allows you to transfer the selected corresponding emails of your choice.
- Delete: allows you to send the selected to the “Trash”
- Mark: for this option see the next paragraph
- … More: for this option see the next paragraph
Mark Message
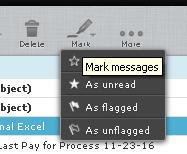
> When you click the "Mark", you get this pop-up menu. So you can mark a message, remove a mark as unread and declare a message has been read. This option also works (and especially) to select multiple emails.
> These options are useful to highlight some of your emails
... More
> When you click the “… More” you get this pop-up menu
> You can the:
- Print this message: open the message in a new window and offers printing.
- Download: allows you to download your computer e-mail format.eml
- Edit as new: allows you to edit an email preserving its original layout.
- Show source: displays the full source of the message. Very useful when you are asked for headers!
- Open in new window: allows you to open the message in a new window (useful for viewing/ open multiple message at time)
Settings
Access Settings
> You must be logged in to your account to access this feature.
> To access the settings of your email account, click the gear at the top right.
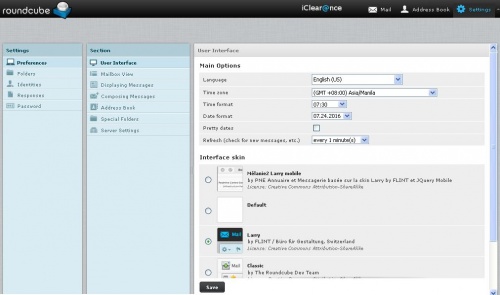
User Interface
> After clicking on the gear you will land directly on the User Interface
> In this interface, you can change various elements such as language, date and time formats and the theme of the interface
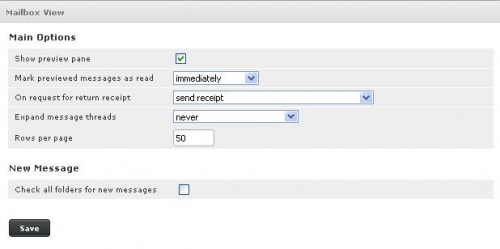
Mailbox View
> In Mailbox View, you can change the number of emails displayed in the interface to generate fewer pages for example if you have a large number of e-mails. You can also choose not to display the preview email interface and display only when double click or in a new window.
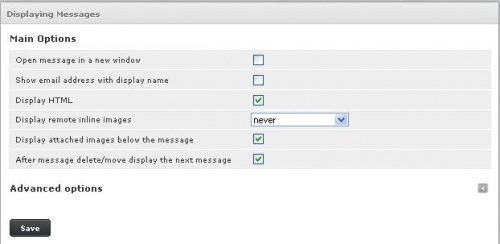
Displaying Message
> In Displaying messages, you can choose to display (HTML or not, remote images, the character encoding) in your emails.
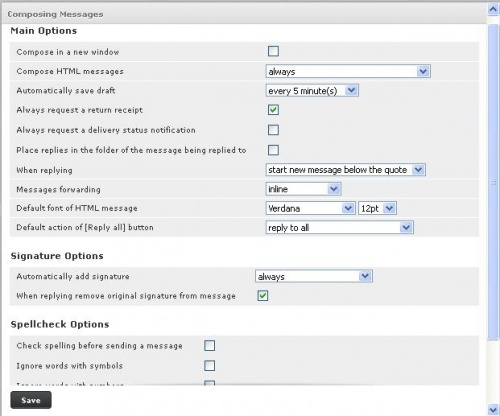
Composing Message
> In Composing messages, you can choose different items related to writing your e-mails, as the format of writing, receipt, distribution, the font, etc. .
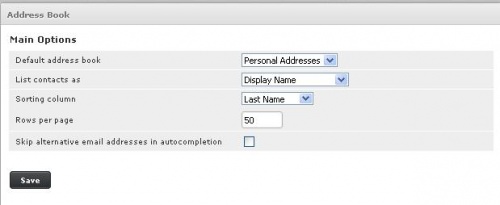
Address Book
> In the Address Book, you can choose the address book to use by default (if several address books were created) as well as options sort and display the contacts.
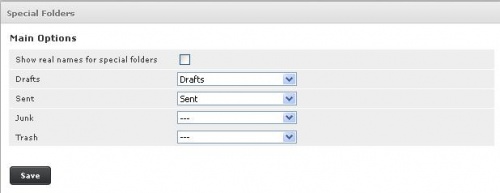
Special Folders
> In Special Folders, you can set where to place emails to be considered Drafts, Sent Items, Junk and emails that go to Trash.
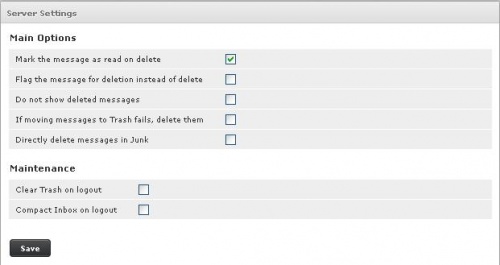
Server Settings
> In Server Settings, you can set the deletion of emails on the server (from the Webmail).
> For other options, see below.
- Example of deleting: You no longer receive e-mails. Your mail box is almost full or over quota. You want to delete emails to “do maintenance” and receive your emails again. However, you encounter an error message that prevents you from deleting the desired messages
- What’s going on? : When deleting an e-mail, it is first copied into the trash before being deleted from the inbox (invisibly to the user). However the box is already full, the copy is not possible, hence the error message!
- How to fix it? : In this interface Server Settings, select “When moving message to trash fails, delete them. “You can now delete emails without any problems.
Settings – Folders
Create Folder
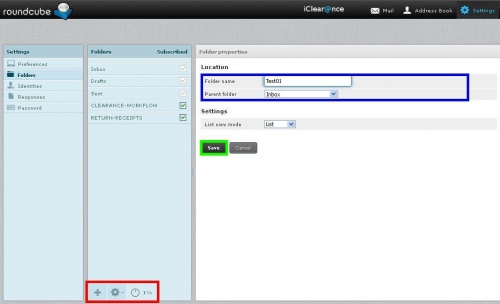
> To create a custom folder and keep messages separate, click the “+”
> It will be placed in the Inbox and viewing will be emails in list mode
> Click Save to validate the creation.
Edit – Delete Folder
> To proceed with the removal, select your folder and click the gear at the bottom of page. You can either: delete the folder or empty the folder. You can also see storage space usage (in percentage).
> To change the folder, simply click on the relevant folder. You can then change the folder name, the parent folder, the display type and can see the number of messages and the present size by the emails in the selected folder. Link "Click for file size" allows for the calculation of the size of these e-mails (when the number is greater than 0).
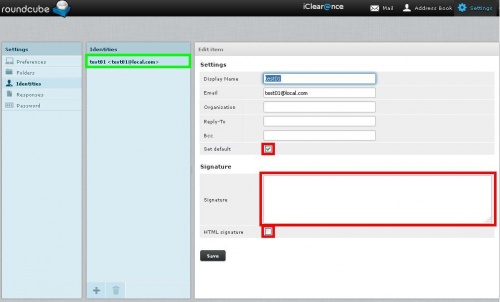
Settings – Identity
Create Folder
