Difference between revisions of "TRANSACTION ENTRY"
| (123 intermediate revisions by 3 users not shown) | |||
| Line 1: | Line 1: | ||
| − | + | [[Main_Page | Main Page]] > [[Application_Development_Team | Application Development Team]] > [[System_Manual | System Manual]] > [[SPGC_EPAYROLL | SPGC EPAYROLL]] | |
| − | |||
| − | + | '''IV. TRANSACTION ENTRY''' | |
| − | + | This tab contains all the transaction entry of the employees. | |
| + | It contains the ff. | ||
| − | + | '''•Salary adjustment – Active -''' this module contains the salary adjustment entry of RNF employees. | |
| + | '''•Salary adjustment – Separated -''' This module contains the salary adjustment record of past RNF employees. | ||
| + | '''•Salary adjustment – VIP -'''this module contains the salary adjustment record of the VIP employees. | ||
| + | '''•Salary adjustment – VIP Separated -''' This module contains the salary adjustment of the past VIP employees. | ||
| − | |||
| − | *When the user click | + | '''*''' SALARY ADJUSTMENT – Active ''' |
| + | |||
| + | [[File:t1.png|600px|center]] | ||
| + | Figure 4.0 | ||
| + | |||
| + | |||
| + | The user will be redirected to this page after clicking the Transaction Entry. | ||
| + | This page contains some basic information about the employee. | ||
| + | |||
| + | '''1.Search field –''' Enter the employee name or employee number of the employee within the search field.Click the search button after to continue the process. Click the employee number of the employee. | ||
| + | '''2.Employee Number –''' Button that will show the SALARY ADJUSTMENT – Active page. | ||
| + | |||
| + | [[File:t2.png|600px|center]] | ||
| + | Figure 4.1 | ||
| + | |||
| + | |||
| + | '''3.Action –''' This module holds the modules namely as Add Record, Open, Paid and All. | ||
| + | |||
| + | [[File:t3.png|600px|center]] | ||
| + | Figure 4.2 | ||
| + | |||
| + | |||
| + | '''4.Add Record - ''' Enables the user to add an SDSA entry. It requires some fields that needs to be filled up. | ||
| + | When the fields are all filled up, the user must click the SAVE button to save the inputted data. | ||
| + | |||
| + | [[File:t4.png|600px|center]] | ||
| + | Figure 4.3 | ||
| + | |||
| + | |||
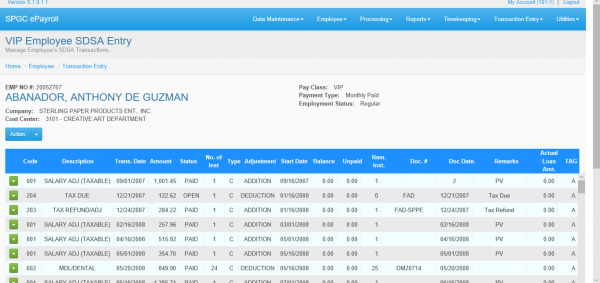
| + | Clicking Open from the action module will redirect the user to this page. It contains the current SDSA transactions of the employee. | ||
| + | |||
| + | [[File:t5.png|600px|center]] | ||
| + | Figure 4.4 | ||
| + | |||
| + | |||
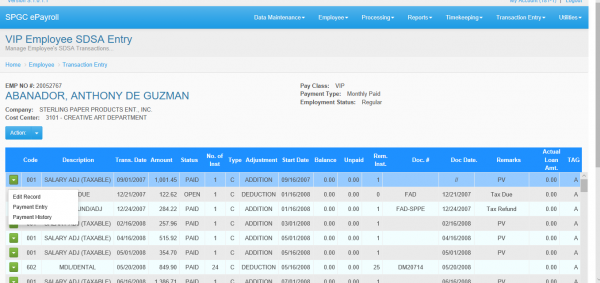
| + | Kindly click the green square in the left side of the page to view more modules. | ||
| + | '''1.Edit Record –''' This module enables the user to edit the SDSA record. | ||
| + | '''2.Payment Entry –''' This module enables the user to view the payment Entry. | ||
| + | '''3.Payment History –''' This module enables the user to view the payment history. | ||
| + | |||
| + | [[File:t6.png|600px|center]] | ||
| + | Figure 4.5 | ||
| + | |||
| + | |||
| + | After clicking the '''Edit Record''', this sub page will appear. It contains the detailed SDSA Entry transaction. To save the changes that made, just kindly click the save button and close button of you wish to cancel the changes. | ||
| + | |||
| + | [[File:t7.png|600px|center]] | ||
| + | Figure 4.6 | ||
| + | |||
| + | |||
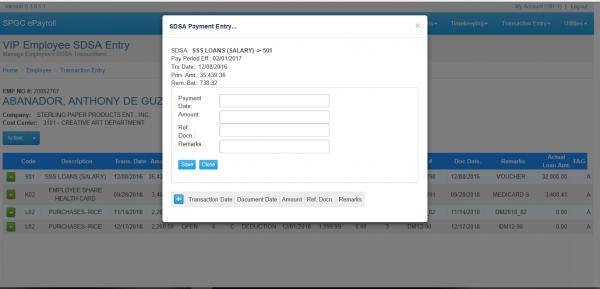
| + | After clicking the payment Entry, this sub page will appear. It contains some info about the SDSA Payment Entry. Click the Add button. | ||
| + | |||
| + | [[File:t8.png|600px|center]] | ||
| + | Figure 4.7 | ||
| + | |||
| + | |||
| + | Clicking the Add button will help the user to add another payment. To complete the process, the user must fill all the fields. And then, click the save button. | ||
| − | [[File: | + | [[File:t9.png|600px|center]] |
| + | Figure 4.8 | ||
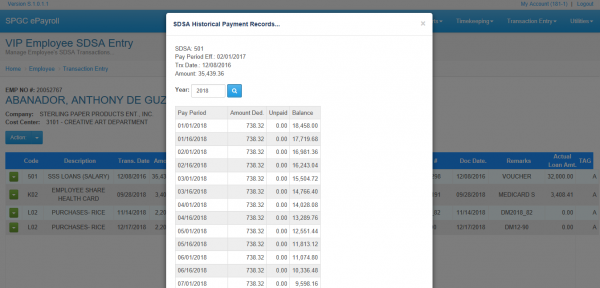
| − | + | Upon clicking Payment History module, a subpage with a payment history of SDSA Entry will appear. It contains the SDSA code, Pay Period, Transaction Date and Amount. Indicate a year in the search field and click the search button. The result of the history will be shown below the subpage. | |
| + | [[File:t10.png|600px|center]] | ||
| + | Figure 4.9 | ||
| − | |||
| + | Clicking '''Paid''' from the action module will redirect the user to this page. It contains the past SDSA transactions of the employee that has been paid off. | ||
| − | + | [[File:t11.png|600px|center]] | |
| − | + | ||
| + | Figure 4.10 | ||
| − | + | Kindly click the green square in the left side of the page to view more modules. | |
| + | '''1.Edit Record –''' This module enables the user to edit the SDSA record. | ||
| + | '''2.Payment Entry –''' This module enables the user to view the payment Entry. | ||
| + | '''3.Payment History –'''This module enables the user to view the payment history. | ||
| − | + | [[File:t12.png|600px|center]] | |
| + | Figure 4.11 | ||
| − | |||
| − | + | After clicking the '''Edit Record''', this subpage will appear. As you can see, there is a message displayed in the top right corner of the subpage. It says, “Records cannot be edit” So the user cannot be able to edit the paid SDSA Entry. | |
| − | + | [[File:t13.png|600px|center]] | |
| + | Figure 4.12 | ||
| + | |||
| − | + | After clicking the '''Payment Entry''', this subpage will appear. It contains some info about the SDSA Payment Entry. Click the Add button. | |
| − | + | [[File:t14.png|600px|center]] | |
| + | Figure 4.13 | ||
| − | + | Clicking the '''Add''' button will help the user to add another payment. To complete the process, the user must fill all the fields. And then, click the save button. | |
| + | [[File:t15.png|600px|center]] | ||
| + | Figure 4.14 | ||
| + | |||
| + | |||
| + | Upon clicking '''Payment History''' module, a subpage with a payment history of SDSA Entry will appear. It contains the SDSA code, Pay Period, Transaction Date and Amount. Indicate a year in the search field and click the search button. The result of the history will be shown below the subpage. | ||
| + | Selecting ALL from the ACTION pane will display all the SDSA Entry | ||
| + | (Paid or Open). | ||
| + | |||
| + | [[File:t16.png|600px|center]] | ||
| + | Figure 4.15 | ||
| + | |||
| + | |||
| + | '''SALARY ADJUSTMENT SEPARATED''' | ||
| + | |||
| + | [[File:t17.png|600px|center]] | ||
| + | Figure 4.16 | ||
| + | |||
| + | |||
| + | This page contains some basic information about the employee. | ||
| + | '''1.Search field –''' Enter the employee name or employee number of the employee within the search field.Click the search button after to continue the process. Click the employee number of the employee. | ||
| + | '''2.Employee Number –''' Button that will show the SALARY ADJUSTMENT – Separated page. | ||
| + | |||
| + | [[File:t18.png|600px|center]] | ||
| + | Figure 4.17 | ||
| + | |||
| + | '''1.Action – This module holds the modules namely as Add Record, Open, Paid and All. | ||
| + | Click Action to view more module. | ||
| + | |||
| + | [[File:t19.png|600px|center]] | ||
| + | Figure 4.18 | ||
| + | |||
| + | |||
| + | '''2.Add Record -''' Enables the user to add an SDSA entry. It requires some fields that needs to be filled up. | ||
| + | When the fields are all filled up, the user must click the SAVE button to save the inputted data. | ||
| + | |||
| + | [[File:t20.png|600px|center]] | ||
| + | Figure 4.19 | ||
| + | |||
| + | |||
| + | Clicking '''Open''' from the action module will redirect the user to this page. It contains the current SDSA transactions of the employee. | ||
| + | |||
| + | [[File:t21.png|600px|center]] | ||
| + | Figure 4.20 | ||
| + | |||
| + | Kindly click the green square in the left side of the page to view more modules. | ||
| + | '''1.Edit Record – This module enables the user to edit the SDSA record. | ||
| + | '''2.Payment Entry – This module enables the user to view the payment Entry. | ||
| + | '''3.Payment History – This module enables the user to view the payment history. | ||
| + | |||
| + | [[File:t22.png|600px|center]] | ||
| + | Figure 4.21 | ||
| + | |||
| + | |||
| + | After clicking the Edit Record, this subpage will appear. It contains the detailed SDSA Entry transaction. To save the changes that made, just kindly click the save button and close button of you wish to cancel the changes. | ||
| + | |||
| + | [[File:t23.png|600px|center]] | ||
| + | Figure 4.22 | ||
| + | |||
| + | |||
| + | After clicking the payment Entry, this subpage will appear. It contains some info about the SDSA Payment Entry. Click the Add button. | ||
| + | |||
| + | [[File:t24.png|600px|center]] | ||
| + | Figure 4.23 | ||
| + | |||
| + | |||
| + | Clicking the '''Add''' button will help the user to add another payment. To complete the process, the user must fill all the fields. And then, click the save button. | ||
| + | |||
| + | [[File:t25.png|600px|center]] | ||
| + | Figure 4.24 | ||
| + | |||
| + | |||
| + | Upon clicking '''Payment History''' module, a subpage with a payment history of SDSA Entry will appear. It contains the SDSA code, Pay Period, Transaction Date and Amount. Indicate a year in the search field and click the search button. The result of the history will be shown below the subpage. | ||
| + | |||
| + | [[File:t26.png|600px|center]] | ||
| + | Figure 4.25 | ||
| + | |||
| + | |||
| + | Clicking '''Paid''' from the action module will redirect the user to this page. It contains the past SDSA transactions of the employee that has been paid off. | ||
| + | |||
| + | [[File:t27.png|600px|center]] | ||
| + | Figure 4.26 | ||
| + | |||
| + | |||
| + | Kindly click the green square in the left side of the page to view more modules. | ||
| + | '''1.Edit Record –''' This module enables the user to edit the SDSA record. | ||
| + | '''2.Payment Entry –''' This module enables the user to view the payment Entry. | ||
| + | '''3.Payment History –''' This module enables the user to view the payment history. | ||
| + | |||
| + | [[File:t28.png|600px|center]] | ||
| + | Figure 4.27 | ||
| + | |||
| + | |||
| + | After clicking the '''Edit Record''', this subpage will appear. As you can see, there is a message displayed in the top right corner of the subpage. It says, “Records cannot be edit” So the user cannot be able to edit the paid SDSA Entry | ||
| − | [[File: | + | [[File:t29.png|600px|center]] |
| + | Figure 4.28 | ||
| − | |||
| − | + | After clicking the '''Payment Entry''', this subpage will appear. It contains some info about the SDSA Payment Entry. Click the Add button. | |
| − | [[File: | + | [[File:t30.png|600px|center]] |
| + | Figure 4.29 | ||
| − | |||
| − | + | Clicking the '''Add''' button will help the user to add another payment. To complete the process, the user must fill all the fields. And then, click the save button. | |
| − | + | [[File:t31.png|600px|center]] | |
| + | Figure 4.30 | ||
| + | Upon clicking '''Payment History''' module, a subpage with a payment history of SDSA Entry will appear. It contains the SDSA code, Pay Period, Transaction Date and Amount. Indicate a year in the search field and click the search button. The result of the history will be shown below the subpage. | ||
| + | Selecting ALL from the ACTION pane will display all the SDSA Entry | ||
| + | (Paid or Open). | ||
| − | [[File: | + | [[File:t32.png|600px|center]] |
| − | + | Figure 4.31 | |
| − | + | ||
| − | |||
| − | + | '''SALARY ADJUSTMENT - VIP''' | |
| − | [[File: | + | [[File:t33.png|600px|center]] |
| + | Figure 4.32 | ||
| − | |||
| − | |||
| + | This page contains some basic information about the employee. | ||
| + | '''1.Search field –''' Enter the employee name or employee number of the employee within the search field.Click the search button after to continue the process. Click the employee number of the employee. | ||
| + | '''2.Employee Number –''' Button that will show the SALARY ADJUSTMENT – Active page. | ||
| − | + | [[File:t34.png|600px|center]] | |
| + | Figure 4.33 | ||
| − | |||
| − | + | '''3.Action –''' This module holds the modules namely as '''Add Record''', '''Open''', '''Paid''' and '''All'''. | |
| − | + | [[File:t35.png|600px|center]] | |
| + | Figure 4.34 | ||
| − | |||
| − | + | '''4.Add Record -''' Enables the user to add an SDSA entry. It requires some fields that needs to be filled up. | |
| + | When the fields are all filled up, the user must click the SAVE button to save the inputted data. | ||
| − | [[File: | + | [[File:t36.png|600px|center]] |
| + | Figure 4.35 | ||
| − | |||
| − | [[File: | + | Clicking '''Open''' from the action module will redirect the user to this page. It contains the current SDSA transactions of the employee. |
| + | [[File:t37.png|600px|center]] | ||
| + | Figure 4.36 | ||
| − | ''' | + | Kindly click the green square in the left side of the page to view more modules. |
| + | '''1.Edit Record –''' This module enables the user to edit the SDSA record. | ||
| + | '''2.Payment Entry –''' This module enables the user to view the payment Entry. | ||
| + | '''3.Payment History –''' This module enables the user to view the payment history. | ||
| − | + | [[File:t38.png|600px|center]] | |
| + | Figure 4.37 | ||
| − | |||
| + | After clicking the Edit Record, this subpage will appear. It contains the detailed SDSA Entry transaction. To save the changes that made, just kindly click the save button and close button of you wish to cancel the changes. | ||
| − | [[File: | + | [[File:t39.png|600px|center]] |
| + | Figure 4.38 | ||
| − | + | After clicking the '''Payment Entry''', this subpage will appear. It contains some info about the SDSA Payment Entry. Click the Add button. | |
| − | + | [[File:t40.png|600px|center]] | |
| + | Figure 4.39 | ||
| − | |||
| − | ''' | + | Clicking the Add button will help the user to add another payment. To complete the process, the user must fill all the fields. And then, click the save button. |
| + | |||
| + | [[File:t41.png|600px|center]] | ||
| + | Figure 4.40 | ||
| + | |||
| + | |||
| + | Upon clicking '''Payment History''' module, a subpage with a payment history of SDSA Entry will appear. It contains the SDSA code, Pay Period, Transaction Date and Amount. Indicate a year in the search field and click the search button. The result of the history will be shown below the subpage. | ||
| + | |||
| + | [[File:t42.png|600px|center]] | ||
| + | Figure 4.41 | ||
| + | |||
| + | |||
| + | Clicking '''Paid''' from the action module will redirect the user to this page. It contains the past SDSA transactions of the employee that has been paid off. | ||
| + | |||
| + | [[File:t43.png|600px|center]] | ||
| + | Figure 4.42 | ||
| + | |||
| + | |||
| + | Kindly click the green square in the left side of the page to view more modules. | ||
| + | '''1.Edit Record –''' This module enables the user to edit the SDSA record. | ||
| + | '''2.Payment Entry –''' This module enables the user to view the payment Entry. | ||
| + | '''3.Payment History –''' This module enables the user to view the payment history. | ||
| + | |||
| + | [[File:t44.png|600px|center]] | ||
| + | Figure 4.43 | ||
| + | |||
| + | After clicking the '''Edit Record''', this subpage will appear. As you can see, there is a message displayed in the top right corner of the subpage. It says, “Records cannot be edit” So the user ''cannot be able to edit the paid SDSA Entry''. | ||
| + | |||
| + | [[File:t45.png|600px|center]] | ||
| + | Figure 4.44 | ||
| − | + | After clicking the '''Payment Entry''', this subpage will appear. It contains some info about the SDSA Payment Entry. Click the Add button. | |
| − | + | ||
| − | + | [[File:t46.png|600px|center]] | |
| + | Figure 4.45 | ||
| + | |||
| + | |||
| + | Clicking the '''Add''' button will help the user to add another payment. To complete the process, the user must fill all the fields. And then, click the save button. | ||
| + | |||
| + | [[File:t47.png|600px|center]] | ||
| + | Figure 4.46 | ||
| + | |||
| + | |||
| + | Upon clicking '''Payment History''' module, a subpage with a payment history of SDSA Entry will appear. It contains the SDSA code, Pay Period, Transaction Date and Amount. Indicate a year in the search field and click the search button. The result of the history will be shown below the subpage. | ||
| + | Selecting ALL from the ACTION pane will display all the SDSA Entry | ||
| + | (Paid or Open). | ||
| + | |||
| + | |||
| + | [[File:t48.png|600px|center]] | ||
| + | Figure 4.47 | ||
| + | |||
| + | |||
| + | |||
| + | |||
| + | '''SALARY ADJUSTMENT VIP SEPARATED''' | ||
| + | |||
| + | [[File:t49.png|600px|center]] | ||
| + | Figure 4.48 | ||
| + | |||
| + | This page contains some basic information about the employee. | ||
| + | '''1.Search field – Enter the employee name or employee number of the employee within the search field.Click the search button after to continue the process. Click the employee number of the employee. | ||
| + | '''2.Employee Number – Button that will show the SALARY ADJUSTMENT – Active page. | ||
| + | |||
| + | [[File:t50.png|600px|center]] | ||
| + | Figure 4.49 | ||
| + | |||
| + | |||
| + | After clicking the employee number, the user will be redirected to this page. This page contains the Employee Number of the employee, Employee Name, Company Name, Pay class, Payment Type, and Employment Status. | ||
| + | '''3.Action –''' This module holds the modules namely as Add Record, Open, Paid and All. | ||
| + | |||
| + | [[File:t51.png|600px|center]] | ||
| + | Figure 4.50 | ||
| + | |||
| + | |||
| + | Upon clicking Add Record will enable the user to add a SDSA entry. It requires some fields that needs to be filled up. | ||
| + | When the fields are all filled up, the user must click the SAVE button to save the inputted data. | ||
| + | '''4.Add Record -'''' Enables the user to add an SDSA entry. It requires some fields that needs to be filled up. | ||
| + | When the fields are all filled up, the user must click the SAVE button to save the inputted data. | ||
| + | |||
| + | [[File:t52.png|600px|center]] | ||
| + | Figure 4.51 | ||
| + | |||
| + | Clicking '''Open''' from the action module will redirect the user to this page. It contains the current SDSA transactions of the employee. | ||
| + | |||
| + | [[File:t53.png|600px|center]] | ||
| + | Figure 4.52 | ||
| + | |||
| + | |||
| + | Kindly click the green square in the left side of the page to view more modules. | ||
| + | '''1.Edit Record –''' This module enables the user to edit the SDSA record. | ||
| + | '''2.Payment Entry –''' This module enables the user to view the payment Entry. | ||
| + | '''3.Payment History –''' This module enables the user to view the payment history. | ||
| + | |||
| + | [[File:t54.png|600px|center]] | ||
| + | Figure 4.53 | ||
| + | |||
| + | |||
| + | |||
| + | After clicking the Edit Record, this subpage will appear. It contains the detailed SDSA Entry transaction. To save the changes that made, just kindly click the save button and close button of you wish to cancel the changes. | ||
| + | [[Media:SDSA_USERS_MANUAL.pdf|Transaction document]] | ||
| + | |||
| + | [[File:t55.png|600px|center]] | ||
| + | Figure 4.54 | ||
| + | |||
| + | |||
| + | After clicking the Payment Entry, this subpage will appear. It contains some info about the SDSA Payment Entry. Click the Add button. | ||
| + | |||
| + | [[File:t56.png|600px|center]] | ||
| + | Figure 4.55 | ||
| + | |||
| + | |||
| + | Clicking the '''Add''' button will help the user to add another payment. To complete the process, the user must fill all the fields. And then, click the save button. | ||
| + | |||
| + | [[File:t57.png|600px|center]] | ||
| + | Figure 4.56 | ||
| + | |||
| + | |||
| + | Upon clicking Payment History module, a subpage with a payment history of SDSA Entry will appear. It contains the SDSA code, Pay Period, Transaction Date and Amount. Indicate a year in the search field and click the search button. The result of the history will be shown below the subpage. | ||
| + | |||
| + | [[File:t58.png|600px|center]] | ||
| + | Figure 4.57 | ||
| + | |||
| + | Clicking '''Paid''' from the action module will redirect the user to this page. It contains the past SDSA transactions of the employee that has been paid off. | ||
| + | |||
| + | [[File:t59.png|600px|center]] | ||
| + | Figure 4.58 | ||
| + | |||
| + | |||
| + | Kindly click the green square in the left side of the page to view more modules. | ||
| + | '''1.Edit Record –''' This module enables the user to edit the SDSA record. | ||
| + | '''2.Payment Entry –''' This module enables the user to view the payment Entry. | ||
| + | '''3.Payment History –''' This module enables the user to view the payment history. | ||
| + | |||
| + | [[File:t60.png|600px|center]] | ||
| + | Figure 4.59 | ||
| + | |||
| + | |||
| + | After clicking the '''Edit Record''', this subpage will appear. As you can see, there is a message displayed in the top right corner of the subpage. It says, “Records cannot be edit” So the user cannot be able to edit the paid SDSA Entry. | ||
| + | |||
| + | [[File:t61.png|600px|center]] | ||
| + | Figure 4.60 | ||
| + | |||
| + | |||
| + | After clicking '''Payment Entry''', this subpage will appear. It contains some info about the SDSA Payment Entry. Click the Add button. | ||
| + | |||
| + | [[File:t62.png|600px|center]] | ||
| + | Figure 4.61 | ||
| + | |||
| + | |||
| + | Clicking the '''Add''' button will help the user to add another payment. To complete the process, the user must fill all the fields. And then, click the save button. | ||
| + | |||
| + | [[File:t63.png|600px|center]] | ||
| + | Figure 4.62 | ||
| + | |||
| + | |||
| + | Upon clicking '''Payment History''' module, a subpage with a payment history of SDSA Entry will appear. It contains the SDSA code, Pay Period, Transaction Date and Amount. Indicate a year in the search field and click the search button. The result of the history will be shown below the subpage. | ||
| + | Selecting ALL from the ACTION pane will display all the SDSA Entry | ||
| + | (Paid or Open). | ||
| + | |||
| + | [[File:t64.png|600px|center]] | ||
| + | Figure 4.63 | ||
| + | |||
| + | |||
| − | |||
| − | |||
| − | |||
| − | |||
| − | |||
| − | |||
| − | + | [[Main_Page | Main Page]] > [[Application_Development_Team | Application Development Team]] > [[System_Manual | System Manual]] > [[SPGC_EPAYROLL | SPGC EPAYROLL]] | |
Latest revision as of 10:33, 12 February 2019
Main Page > Application Development Team > System Manual > SPGC EPAYROLL
IV. TRANSACTION ENTRY
This tab contains all the transaction entry of the employees.
It contains the ff.
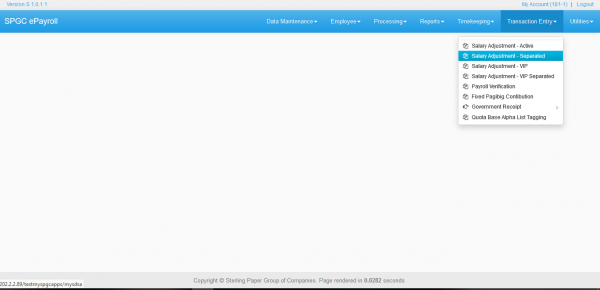
  •Salary adjustment – Active - this module contains the salary adjustment entry of RNF employees.
  •Salary adjustment – Separated - This module contains the salary adjustment record of past RNF employees.
  •Salary adjustment – VIP -this module contains the salary adjustment record of the VIP employees.
  •Salary adjustment – VIP Separated - This module contains the salary adjustment of the past VIP employees.
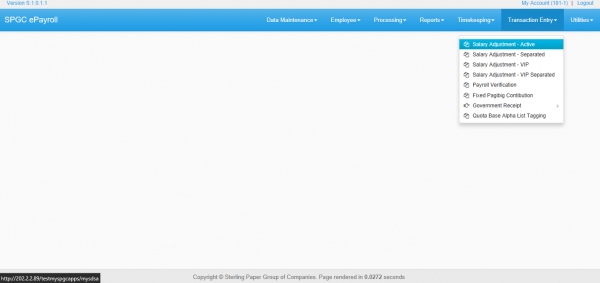
* SALARY ADJUSTMENT – Active
Figure 4.0
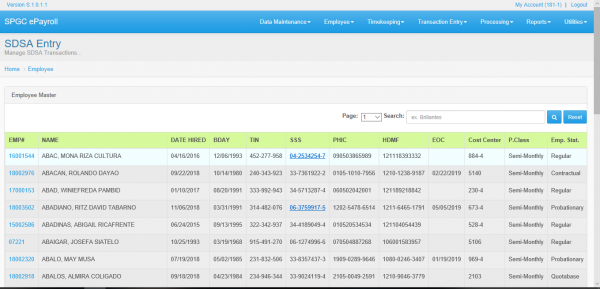
The user will be redirected to this page after clicking the Transaction Entry.
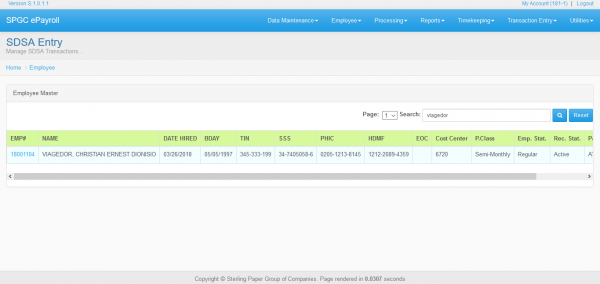
This page contains some basic information about the employee.
  1.Search field – Enter the employee name or employee number of the employee within the search field.Click the search button after to continue the process. Click the employee number of the employee.
  2.Employee Number – Button that will show the SALARY ADJUSTMENT – Active page.
Figure 4.1
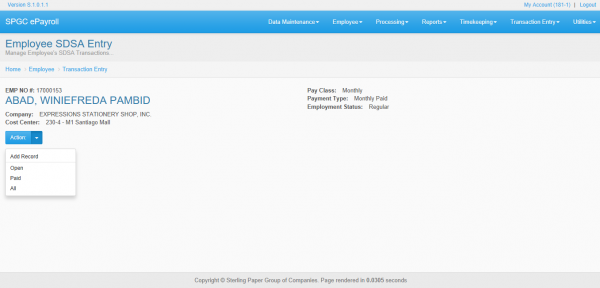
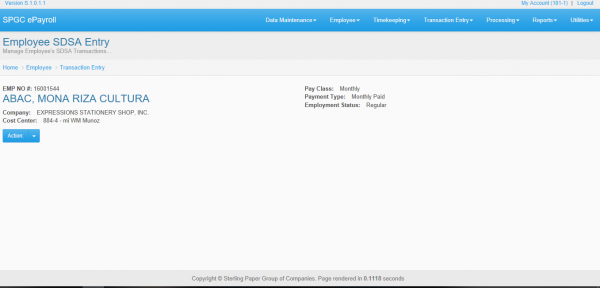
3.Action – This module holds the modules namely as Add Record, Open, Paid and All.
Figure 4.2
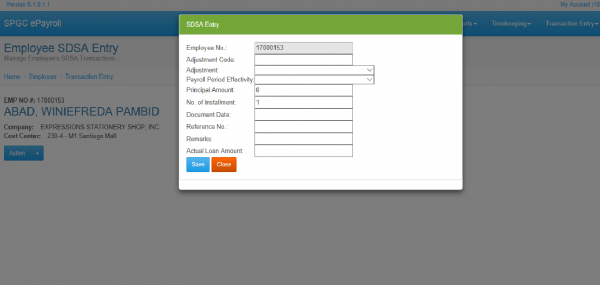
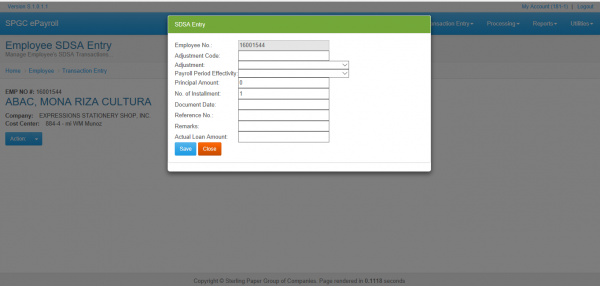
  4.Add Record -  Enables the user to add an SDSA entry. It requires some fields that needs to be filled up.
 When the fields are all filled up, the user must click the SAVE button to save the inputted data.
Figure 4.3
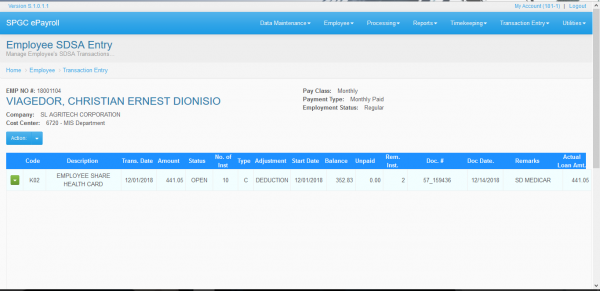
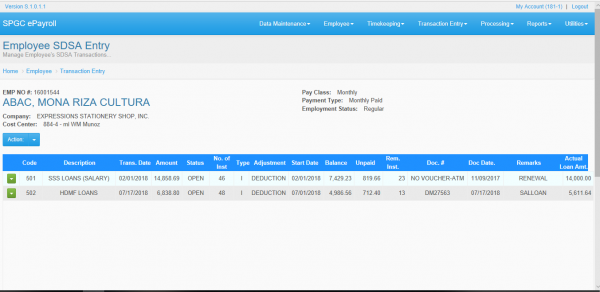
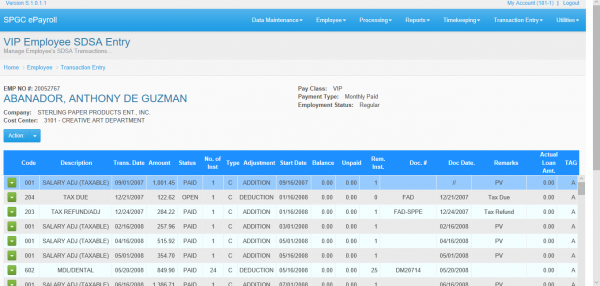
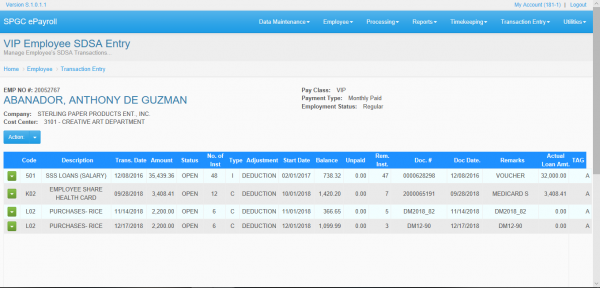
Clicking Open from the action module will redirect the user to this page. It contains the current SDSA transactions of the employee.
Figure 4.4
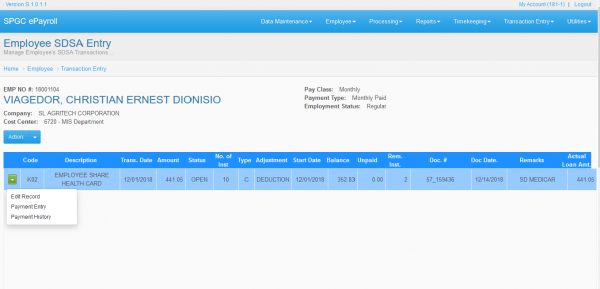
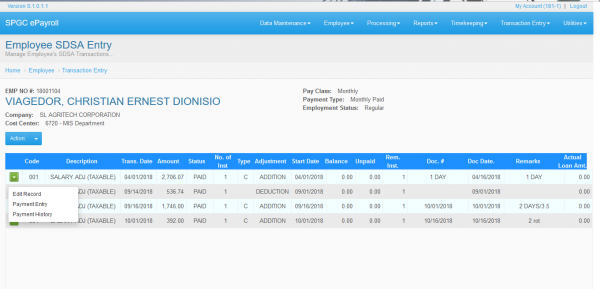
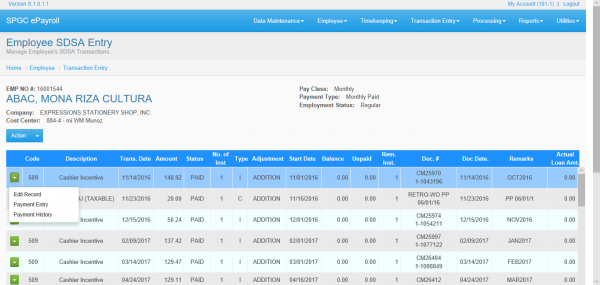
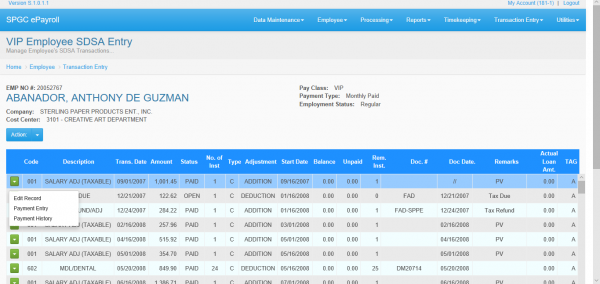
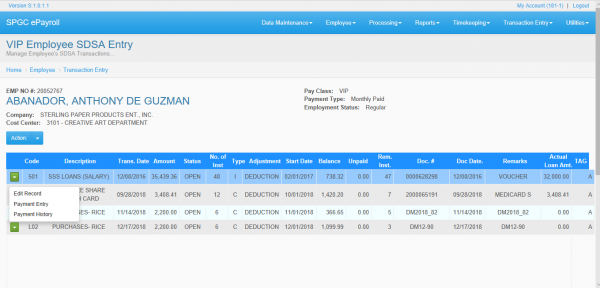
 Kindly click the green square in the left side of the page to view more modules.
  1.Edit Record – This module enables the user to edit the SDSA record.
  2.Payment Entry – This module enables the user to view the payment Entry.
  3.Payment History – This module enables the user to view the payment history.
Figure 4.5
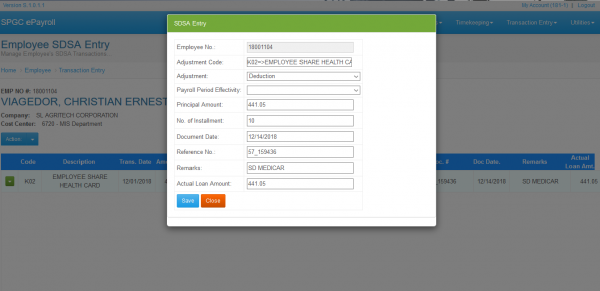
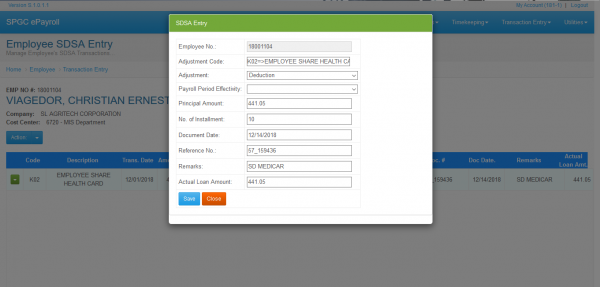
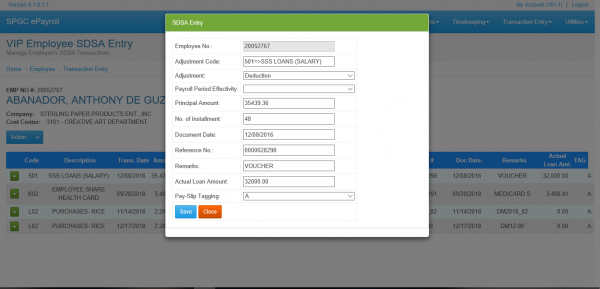
After clicking the Edit Record, this sub page will appear. It contains the detailed SDSA Entry transaction. To save the changes that made, just kindly click the save button and close button of you wish to cancel the changes.
Figure 4.6
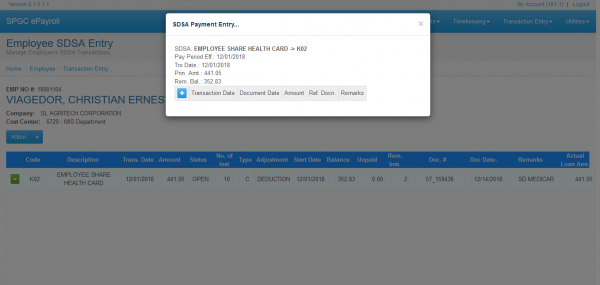
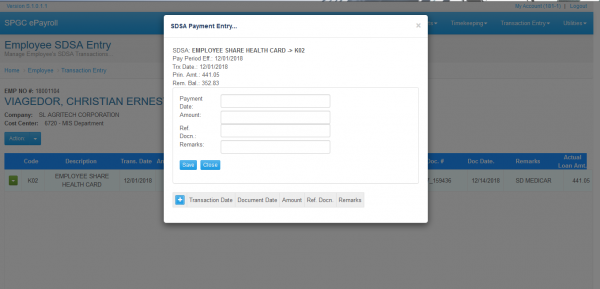
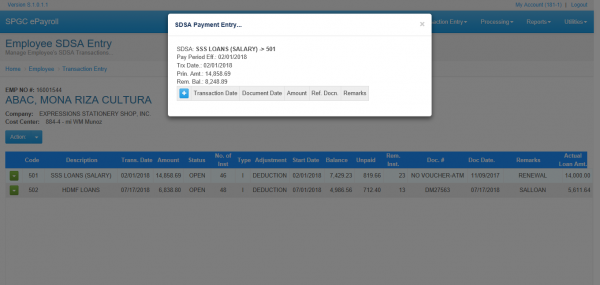
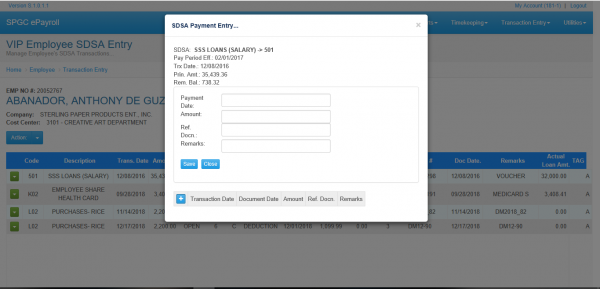
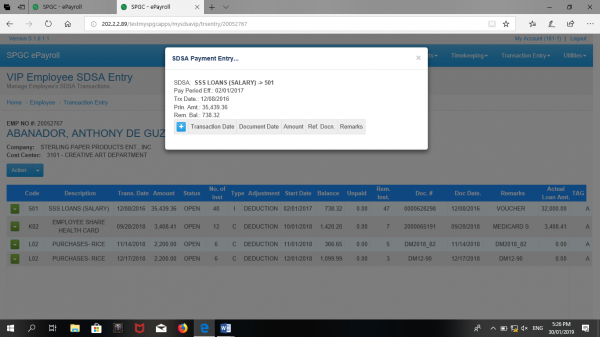
After clicking the payment Entry, this sub page will appear. It contains some info about the SDSA Payment Entry. Click the Add button.
Figure 4.7
Clicking the Add button will help the user to add another payment. To complete the process, the user must fill all the fields. And then, click the save button.
Figure 4.8
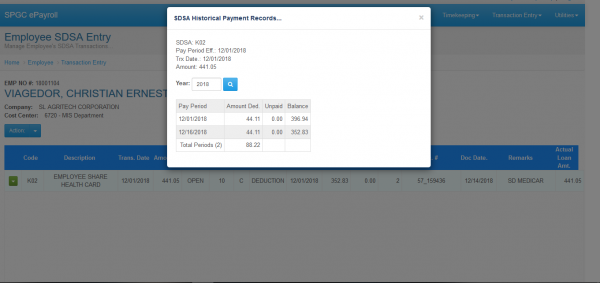
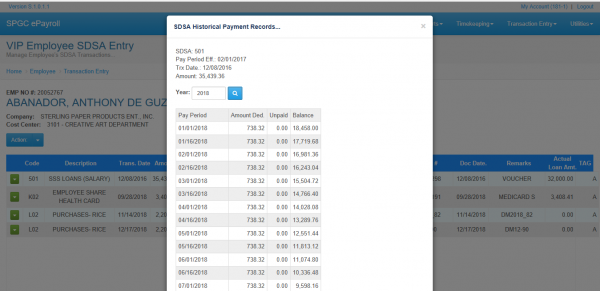
Upon clicking Payment History module, a subpage with a payment history of SDSA Entry will appear. It contains the SDSA code, Pay Period, Transaction Date and Amount. Indicate a year in the search field and click the search button. The result of the history will be shown below the subpage.
Figure 4.9
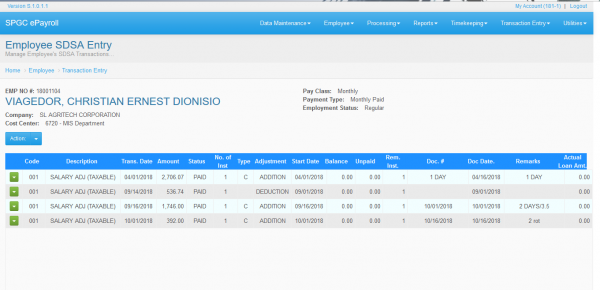
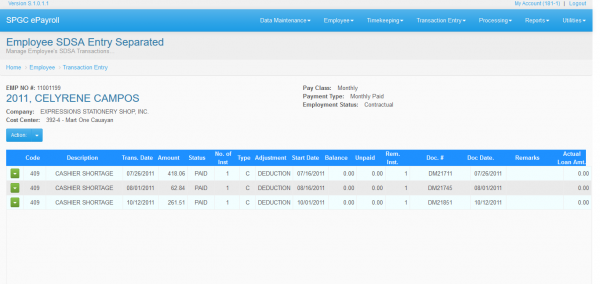
Clicking Paid from the action module will redirect the user to this page. It contains the past SDSA transactions of the employee that has been paid off.
Figure 4.10
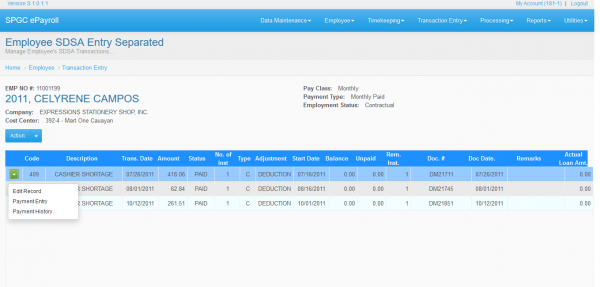
 Kindly click the green square in the left side of the page to view more modules.
  1.Edit Record – This module enables the user to edit the SDSA record.
  2.Payment Entry – This module enables the user to view the payment Entry.
  3.Payment History –This module enables the user to view the payment history.
Figure 4.11
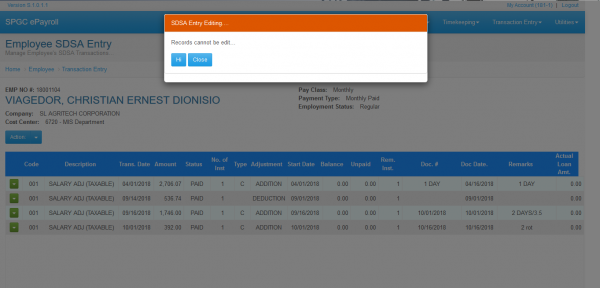
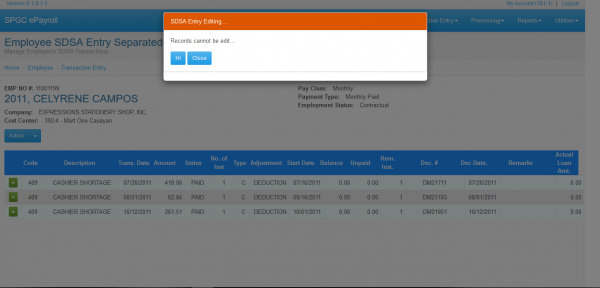
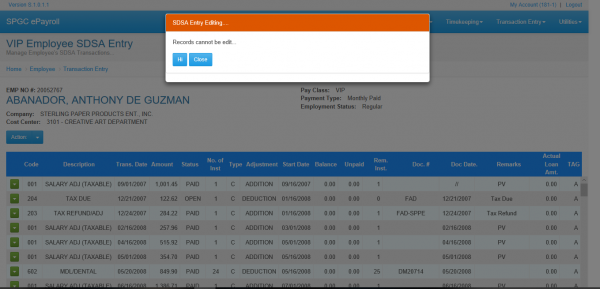
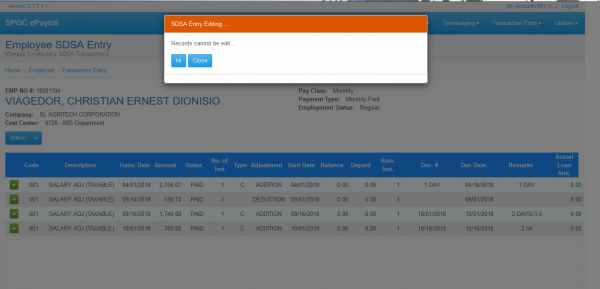
After clicking the Edit Record, this subpage will appear. As you can see, there is a message displayed in the top right corner of the subpage. It says, “Records cannot be edit” So the user cannot be able to edit the paid SDSA Entry.
Figure 4.12
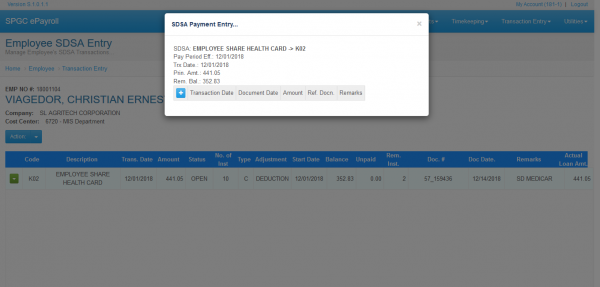
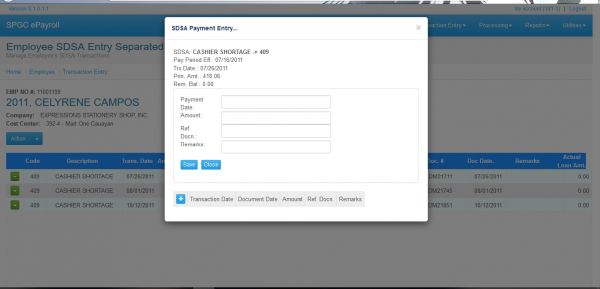
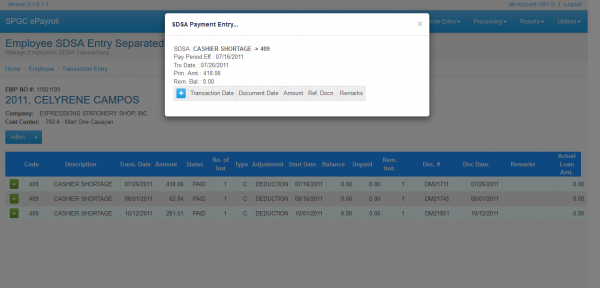
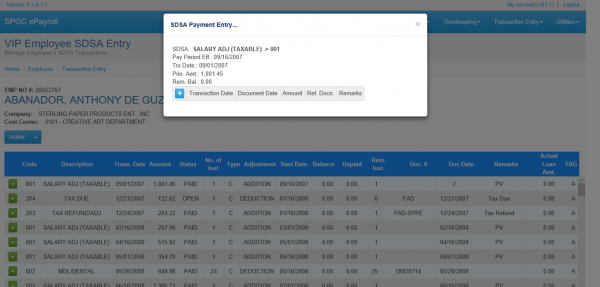
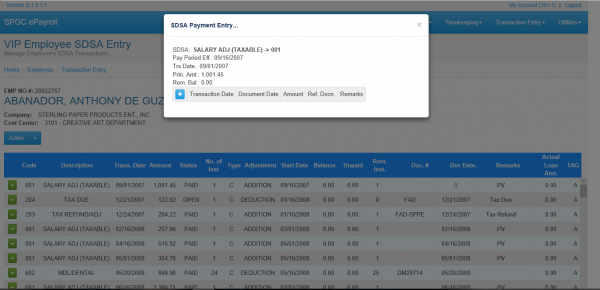
After clicking the Payment Entry, this subpage will appear. It contains some info about the SDSA Payment Entry. Click the Add button.
Figure 4.13
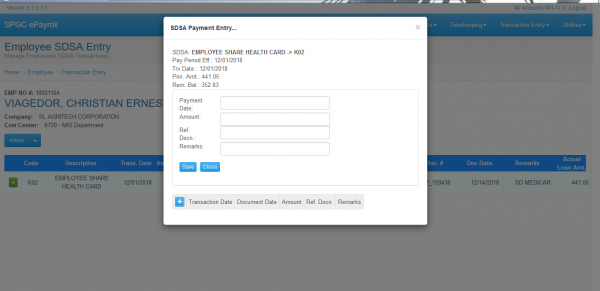
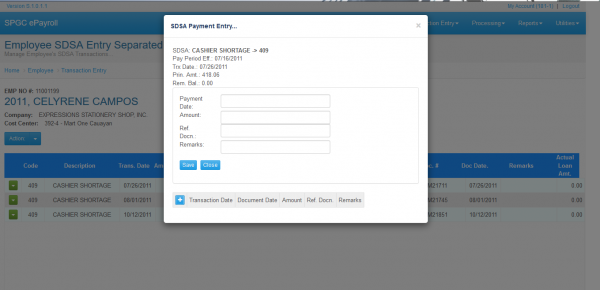
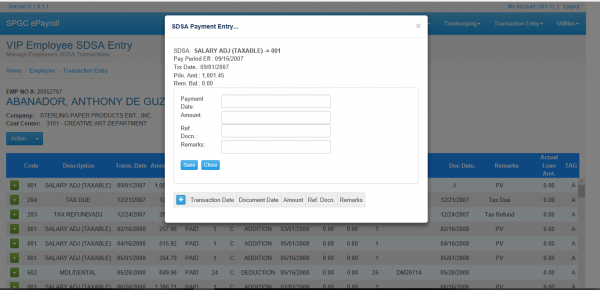
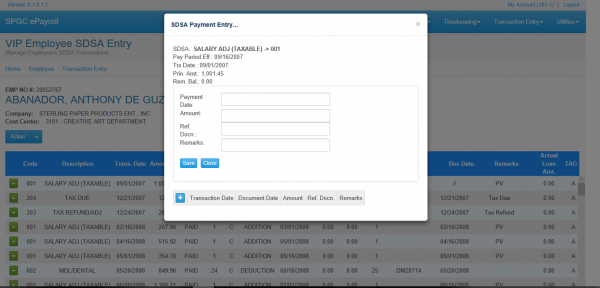
Clicking the Add button will help the user to add another payment. To complete the process, the user must fill all the fields. And then, click the save button.
Figure 4.14
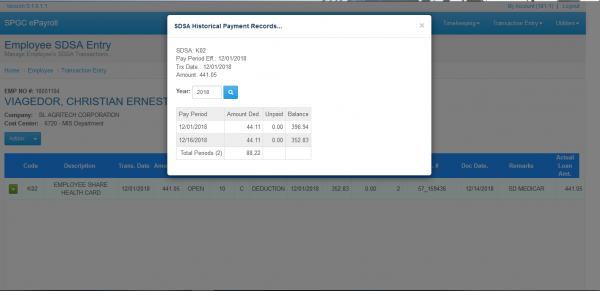
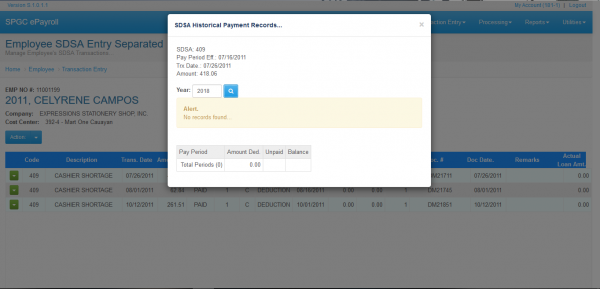
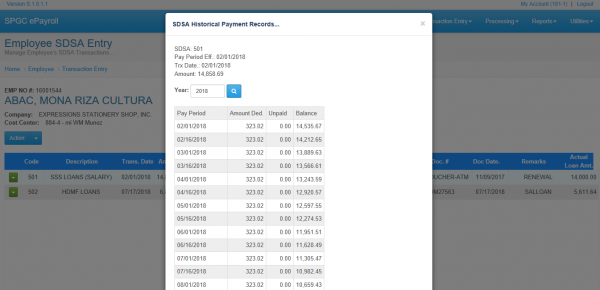
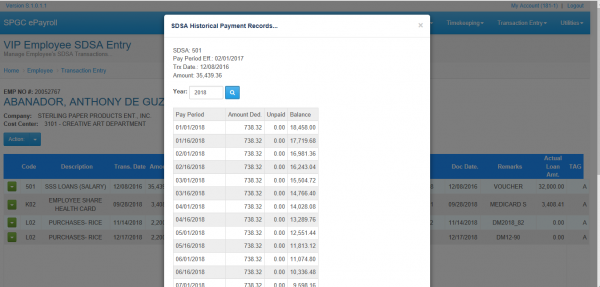
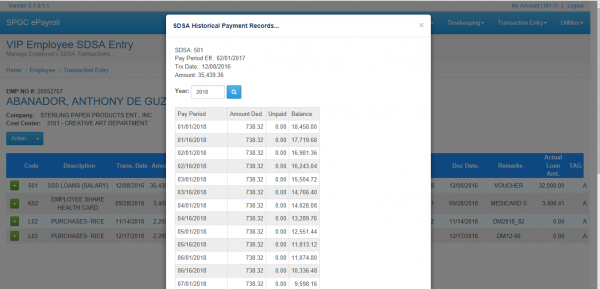
 Upon clicking Payment History module, a subpage with a payment history of SDSA Entry will appear. It contains the SDSA code, Pay Period, Transaction Date and Amount. Indicate a year in the search field and click the search button. The result of the history will be shown below the subpage.
                                    Selecting ALL from the ACTION pane will display all the SDSA Entry
                                                          (Paid or Open).
Figure 4.15
SALARY ADJUSTMENT SEPARATED
Figure 4.16
 This page contains some basic information about the employee.
  1.Search field – Enter the employee name or employee number of the employee within the search field.Click the search button after to continue the process. Click the employee number of the employee.
  2.Employee Number – Button that will show the SALARY ADJUSTMENT – Separated page.
Figure 4.17
  1.Action – This module holds the modules namely as Add Record, Open, Paid and All.
 Click Action to view more module.
Figure 4.18
2.Add Record - Enables the user to add an SDSA entry. It requires some fields that needs to be filled up.
When the fields are all filled up, the user must click the SAVE button to save the inputted data.
Figure 4.19
Clicking Open from the action module will redirect the user to this page. It contains the current SDSA transactions of the employee.
Figure 4.20
 Kindly click the green square in the left side of the page to view more modules.
  1.Edit Record – This module enables the user to edit the SDSA record.
  2.Payment Entry – This module enables the user to view the payment Entry.
  3.Payment History – This module enables the user to view the payment history.
Figure 4.21
After clicking the Edit Record, this subpage will appear. It contains the detailed SDSA Entry transaction. To save the changes that made, just kindly click the save button and close button of you wish to cancel the changes.
Figure 4.22
After clicking the payment Entry, this subpage will appear. It contains some info about the SDSA Payment Entry. Click the Add button.
Figure 4.23
Clicking the Add button will help the user to add another payment. To complete the process, the user must fill all the fields. And then, click the save button.
Figure 4.24
Upon clicking Payment History module, a subpage with a payment history of SDSA Entry will appear. It contains the SDSA code, Pay Period, Transaction Date and Amount. Indicate a year in the search field and click the search button. The result of the history will be shown below the subpage.
Figure 4.25
Clicking Paid from the action module will redirect the user to this page. It contains the past SDSA transactions of the employee that has been paid off.
Figure 4.26
 Kindly click the green square in the left side of the page to view more modules.
  1.Edit Record – This module enables the user to edit the SDSA record.
  2.Payment Entry – This module enables the user to view the payment Entry.
  3.Payment History – This module enables the user to view the payment history.
Figure 4.27
After clicking the Edit Record, this subpage will appear. As you can see, there is a message displayed in the top right corner of the subpage. It says, “Records cannot be edit” So the user cannot be able to edit the paid SDSA Entry
Figure 4.28
After clicking the Payment Entry, this subpage will appear. It contains some info about the SDSA Payment Entry. Click the Add button.
Figure 4.29
Clicking the Add button will help the user to add another payment. To complete the process, the user must fill all the fields. And then, click the save button.
Figure 4.30
 Upon clicking Payment History module, a subpage with a payment history of SDSA Entry will appear. It contains the SDSA code, Pay Period, Transaction Date and Amount. Indicate a year in the search field and click the search button. The result of the history will be shown below the subpage.
                                    Selecting ALL from the ACTION pane will display all the SDSA Entry
                                                              (Paid or Open).
Figure 4.31
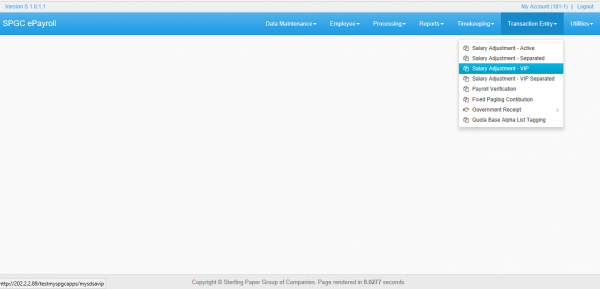
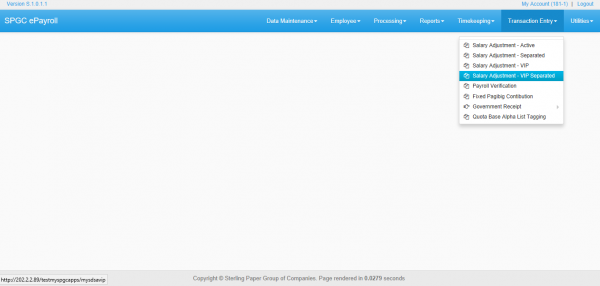
SALARY ADJUSTMENT - VIP
Figure 4.32
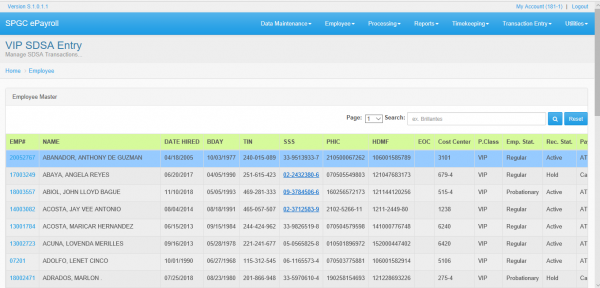
 This page contains some basic information about the employee.
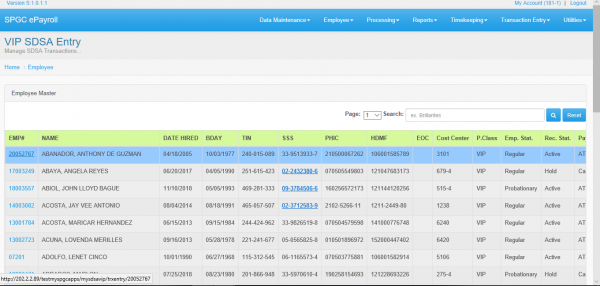
  1.Search field – Enter the employee name or employee number of the employee within the search field.Click the search button after to continue the process. Click the employee number of the employee.
  2.Employee Number – Button that will show the SALARY ADJUSTMENT – Active page.
Figure 4.33
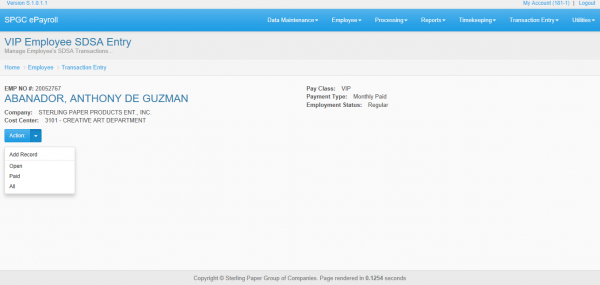
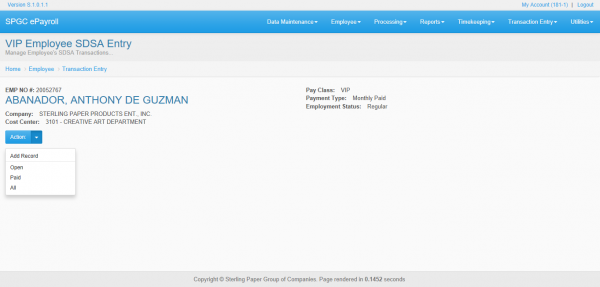
3.Action – This module holds the modules namely as Add Record, Open, Paid and All.
Figure 4.34
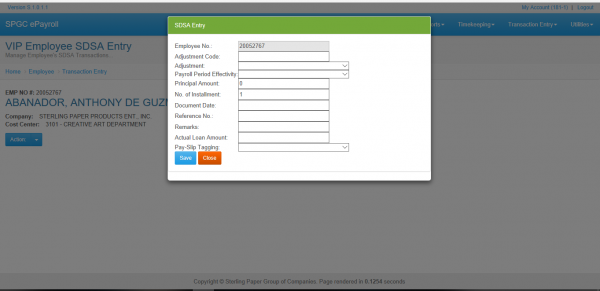
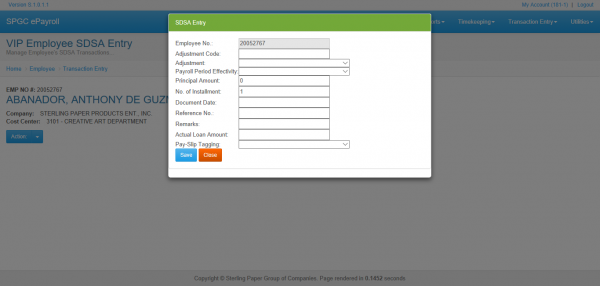
4.Add Record - Enables the user to add an SDSA entry. It requires some fields that needs to be filled up.
When the fields are all filled up, the user must click the SAVE button to save the inputted data.
Figure 4.35
Clicking Open from the action module will redirect the user to this page. It contains the current SDSA transactions of the employee.
Figure 4.36
 Kindly click the green square in the left side of the page to view more modules.
  1.Edit Record – This module enables the user to edit the SDSA record.
  2.Payment Entry – This module enables the user to view the payment Entry.
  3.Payment History – This module enables the user to view the payment history.
Figure 4.37
After clicking the Edit Record, this subpage will appear. It contains the detailed SDSA Entry transaction. To save the changes that made, just kindly click the save button and close button of you wish to cancel the changes.
Figure 4.38
After clicking the Payment Entry, this subpage will appear. It contains some info about the SDSA Payment Entry. Click the Add button.
Figure 4.39
Clicking the Add button will help the user to add another payment. To complete the process, the user must fill all the fields. And then, click the save button.
Figure 4.40
Upon clicking Payment History module, a subpage with a payment history of SDSA Entry will appear. It contains the SDSA code, Pay Period, Transaction Date and Amount. Indicate a year in the search field and click the search button. The result of the history will be shown below the subpage.
Figure 4.41
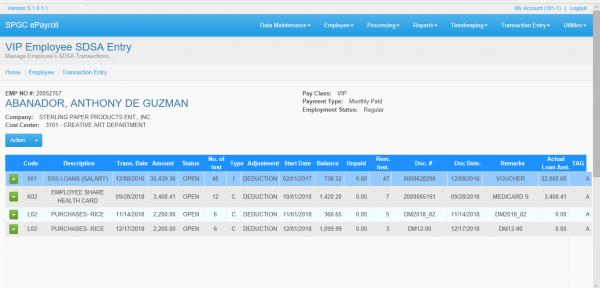
Clicking Paid from the action module will redirect the user to this page. It contains the past SDSA transactions of the employee that has been paid off.
Figure 4.42
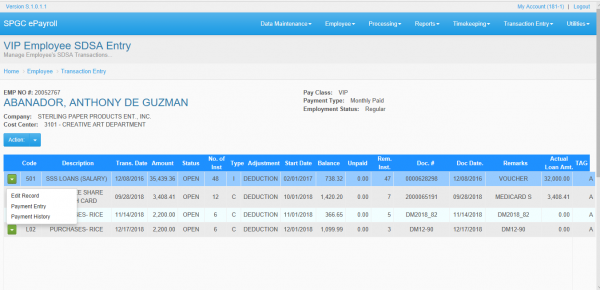
 Kindly click the green square in the left side of the page to view more modules.
  1.Edit Record – This module enables the user to edit the SDSA record.
  2.Payment Entry – This module enables the user to view the payment Entry.
  3.Payment History – This module enables the user to view the payment history.
Figure 4.43
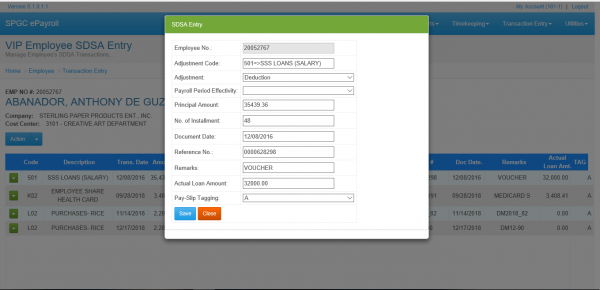
After clicking the Edit Record, this subpage will appear. As you can see, there is a message displayed in the top right corner of the subpage. It says, “Records cannot be edit” So the user cannot be able to edit the paid SDSA Entry.
Figure 4.44
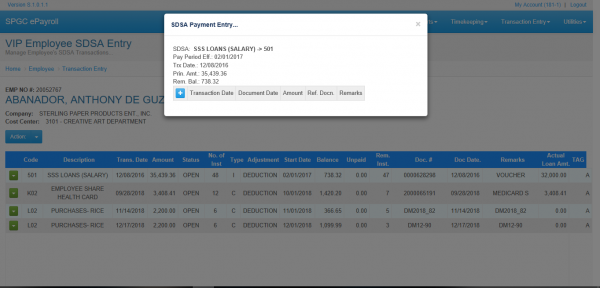
After clicking the Payment Entry, this subpage will appear. It contains some info about the SDSA Payment Entry. Click the Add button.
Figure 4.45
Clicking the Add button will help the user to add another payment. To complete the process, the user must fill all the fields. And then, click the save button.
Figure 4.46
 Upon clicking Payment History module, a subpage with a payment history of SDSA Entry will appear. It contains the SDSA code, Pay Period, Transaction Date and Amount. Indicate a year in the search field and click the search button. The result of the history will be shown below the subpage.
                                    Selecting ALL from the ACTION pane will display all the SDSA Entry
                                                             (Paid or Open).
Figure 4.47
SALARY ADJUSTMENT VIP SEPARATED
Figure 4.48
 This page contains some basic information about the employee.
  1.Search field – Enter the employee name or employee number of the employee within the search field.Click the search button after   to continue the process. Click the employee number of the employee.
  2.Employee Number – Button that will show the SALARY ADJUSTMENT – Active page.
Figure 4.49
 After clicking the employee number, the user will be redirected to this page. This page contains the Employee Number of the employee, Employee Name, Company Name, Pay class, Payment Type, and Employment Status.
  3.Action – This module holds the modules namely as Add Record, Open, Paid and All.
Figure 4.50
Upon clicking Add Record will enable the user to add a SDSA entry. It requires some fields that needs to be filled up.
When the fields are all filled up, the user must click the SAVE button to save the inputted data.
4.Add Record -' Enables the user to add an SDSA entry. It requires some fields that needs to be filled up.
When the fields are all filled up, the user must click the SAVE button to save the inputted data.
Figure 4.51
Clicking Open from the action module will redirect the user to this page. It contains the current SDSA transactions of the employee.
Figure 4.52
 Kindly click the green square in the left side of the page to view more modules.
  1.Edit Record – This module enables the user to edit the SDSA record.
  2.Payment Entry – This module enables the user to view the payment Entry.
  3.Payment History – This module enables the user to view the payment history.
Figure 4.53
After clicking the Edit Record, this subpage will appear. It contains the detailed SDSA Entry transaction. To save the changes that made, just kindly click the save button and close button of you wish to cancel the changes. Transaction document
Figure 4.54
After clicking the Payment Entry, this subpage will appear. It contains some info about the SDSA Payment Entry. Click the Add button.
Figure 4.55
Clicking the Add button will help the user to add another payment. To complete the process, the user must fill all the fields. And then, click the save button.
Figure 4.56
Upon clicking Payment History module, a subpage with a payment history of SDSA Entry will appear. It contains the SDSA code, Pay Period, Transaction Date and Amount. Indicate a year in the search field and click the search button. The result of the history will be shown below the subpage.
Figure 4.57
Clicking Paid from the action module will redirect the user to this page. It contains the past SDSA transactions of the employee that has been paid off.
Figure 4.58
 Kindly click the green square in the left side of the page to view more modules.
  1.Edit Record – This module enables the user to edit the SDSA record.
  2.Payment Entry – This module enables the user to view the payment Entry.
  3.Payment History – This module enables the user to view the payment history.
Figure 4.59
After clicking the Edit Record, this subpage will appear. As you can see, there is a message displayed in the top right corner of the subpage. It says, “Records cannot be edit” So the user cannot be able to edit the paid SDSA Entry.
Figure 4.60
After clicking Payment Entry, this subpage will appear. It contains some info about the SDSA Payment Entry. Click the Add button.
Figure 4.61
Clicking the Add button will help the user to add another payment. To complete the process, the user must fill all the fields. And then, click the save button.
Figure 4.62
 Upon clicking Payment History module, a subpage with a payment history of SDSA Entry will appear. It contains the SDSA code, Pay Period, Transaction Date and Amount. Indicate a year in the search field and click the search button. The result of the history will be shown below the subpage.
                                      Selecting ALL from the ACTION pane will display all the SDSA Entry
                                                             (Paid or Open).
Figure 4.63
Main Page > Application Development Team > System Manual > SPGC EPAYROLL
