Difference between revisions of "PROCESSING MANUAL"
From SPGC Document Wiki
| (11 intermediate revisions by 3 users not shown) | |||
| Line 1: | Line 1: | ||
| + | [[Main_Page | Main Page]] > [[Application_Development_Team | Application Development Team]] > [[System_Manual | System Manual]] > [[SPGC_EPAYROLL | SPGC EPAYROLL]] | ||
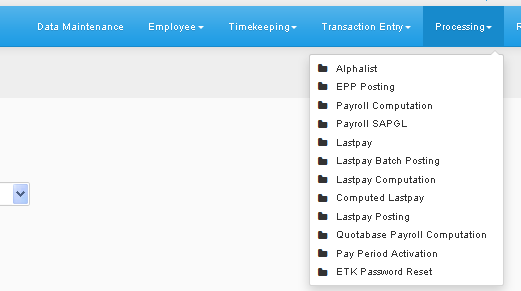
| + | * Clicking '''Processing''' drop down menu of the user will viewed what was under the Processing Module Generation categorized. | ||
| + | [[File:Reppp.png|600px|center|]] | ||
| − | |||
| − | |||
| − | + | =='''Alphalist'''== | |
| − | + | ||
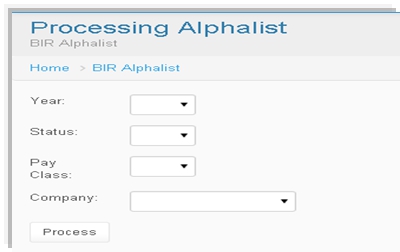
| − | + | click the combo box for the '''Year''', '''Status''', '''Pay Class''' and '''Company''' then select. Click '''Process''' button | |
| − | + | ||
[[File:Alphalist.jpg|center|]] | [[File:Alphalist.jpg|center|]] | ||
| − | * Payroll Computation also have the dialog box indicated to remind the user. | + | |
| + | |||
| + | =='''EPP Posting'''== | ||
| + | |||
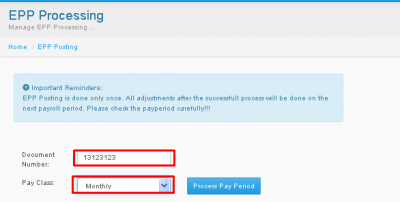
| + | '''*''' In EPP Posting Module, you will be seeing; Document Number, and Payroll Period Combo box. Now Enter the Document Number, and choose from the Pay Class Combo box. | ||
| + | |||
| + | [[File:epost.png|center|400px]] | ||
| + | |||
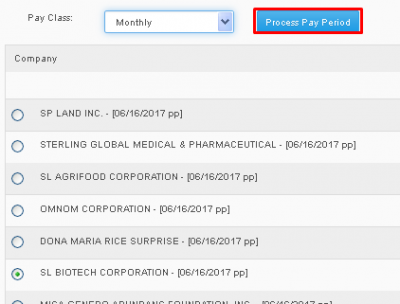
| + | '''*''' After Picking a Pay Class, Companies will appear below, choose your desired company, then press Process Pay Period. | ||
| + | |||
| + | |||
| + | [[File:epost1.png|center|400px]] | ||
| + | |||
| + | |||
| + | =='''Payroll Computation'''== | ||
| + | |||
| + | It also have the dialog box indicated to remind the user. To input just click the '''Pay Class''' type combo box and select. Select also the '''Company''' then click Process '''Pay''' '''Period''' button. | ||
[[File:Payroll_computation.jpg|center|]] | [[File:Payroll_computation.jpg|center|]] | ||
| + | |||
| + | |||
| + | =='''Payroll SAPGL'''== | ||
| + | |||
| + | Just click the combo box for the '''Pay Class''' type and '''Company''' and select . | ||
| + | [[File:Payroll_sapgl.jpg|center|]] | ||
| + | |||
| + | |||
| + | =='''Last Pay'''== | ||
| + | |||
| + | '''*''' In Last Pay module, You will need to search for a desired Separated Employee. First enter the Employee Number, then press the Magnifying glass logo button to search. | ||
| + | |||
| + | |||
| + | [[File:epost2.png|center|400px]] | ||
| + | |||
| + | '''*''' Now that Employee will appear below, pick your desired employee then click the checkbox on the left side of the list, then press Process button. | ||
| + | |||
| + | |||
| + | [[File:epost3.png|center|400px]] | ||
| + | |||
| + | =='''Lastpay Batch Posting'''== | ||
| + | |||
| + | '''*'''In Lastpay Batch Posting, just pick the Pay Class, Company, and Reference Number on their respective Combo boxes, then press '''Post''' | ||
| + | |||
| + | |||
| + | [[File:epost4.png|center|400px]] | ||
| + | |||
| + | |||
| + | =='''Last Pay Computation'''== | ||
| + | |||
| + | |||
| + | '''*'''In Lastpay Computation, just pick the Year, Pay Class, Company, and Reference Number on their respective Combo boxes, then press '''Compute'''. | ||
| + | |||
| + | |||
| + | [[File:epost5.png|center|400px]] | ||
| + | |||
| + | |||
| + | =='''Computed Last Pay'''== | ||
| + | |||
| + | |||
| + | '''*''' In Computed Last Pay Module, Just search for separated employee, enter the name on the textbox then press search button. | ||
| + | |||
| + | [[File:epost6.png|center|400px]] | ||
| + | |||
| + | '''*''' Results of the search will appear below, now press the employee number of desired Employee. | ||
| + | |||
| + | |||
| + | [[File:epost7.png|center|400px]] | ||
| + | |||
| + | '''*''' Now you will be redirected to the Employess information, you may press the [+] button to add Earnings or Deductions or Press save to save changes, and press Refresh to refresh the information. | ||
| + | |||
| + | [[File:epost8.png|center|400px]] | ||
| + | |||
| + | '''*''' Now if you pressed the [+] button, SDSA code and Amount text box will appear now enter the proper SDSA code and Amount Press enter, then press '''Save''' to save the changes. | ||
| + | |||
| + | [[File:epost9.png|center|400px]] | ||
| + | |||
| + | =='''Last Pay Posting'''== | ||
| + | |||
| + | |||
| + | '''*'''In Lastpay Posting, just pick the Pay Class, Company, and Reference Number on their respective Combo boxes, then press '''Post'''. | ||
| + | |||
| + | |||
| + | [[File:epost10.png|center|400px]] | ||
| + | |||
| + | |||
| + | =='''Quotabase Payroll Processing'''== | ||
| + | |||
| + | '''*'''In Quotabase Payroll Processing, just pick the desired Location then press '''Process Pay Period'''. | ||
| + | |||
| + | |||
| + | [[File:epost11.png|center|400px]] | ||
| + | |||
| + | |||
| + | |||
| + | |||
| + | =='''Pay Period Activation '''== | ||
| + | |||
| + | |||
| + | '''*'''In Pay Period Activation , just pick the desired Company then press '''Activate Pay Period'''. | ||
| + | |||
| + | |||
| + | [[File:epost12.png|center|400px]] | ||
| + | |||
| + | |||
| + | |||
| + | =='''ETK Password Reset'''== | ||
| + | |||
| + | |||
| + | |||
| + | '''*'''In ETK Password Reset , just input the desired Employee number then press '''Reset Password'''. | ||
| + | |||
| + | |||
| + | [[File:epost12.png|center|400px]] | ||
| + | |||
| + | |||
| + | |||
| + | == '''Reference''' == | ||
| + | [[Media:Processing_Manual.doc|Processing_Manual document]] | ||
| + | |||
| + | |||
| + | [[Main_Page | Main Page]] > [[Application_Development_Team | Application Development Team]] > [[System_Manual | System Manual]] > [[SPGC_EPAYROLL | SPGC EPAYROLL]] | ||
Latest revision as of 13:44, 6 July 2017
Main Page > Application Development Team > System Manual > SPGC EPAYROLL
* Clicking Processing drop down menu of the user will viewed what was under the Processing Module Generation categorized.
Contents
Alphalist
click the combo box for the Year, Status, Pay Class and Company then select. Click Process button
EPP Posting
* In EPP Posting Module, you will be seeing; Document Number, and Payroll Period Combo box. Now Enter the Document Number, and choose from the Pay Class Combo box.
* After Picking a Pay Class, Companies will appear below, choose your desired company, then press Process Pay Period.
Payroll Computation
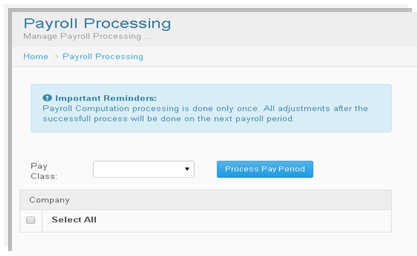
It also have the dialog box indicated to remind the user. To input just click the Pay Class type combo box and select. Select also the Company then click Process Pay Period button.
Payroll SAPGL
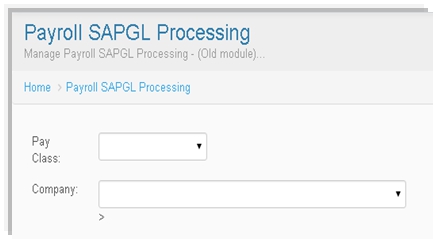
Just click the combo box for the Pay Class type and Company and select .
Last Pay
* In Last Pay module, You will need to search for a desired Separated Employee. First enter the Employee Number, then press the Magnifying glass logo button to search.
* Now that Employee will appear below, pick your desired employee then click the checkbox on the left side of the list, then press Process button.
Lastpay Batch Posting
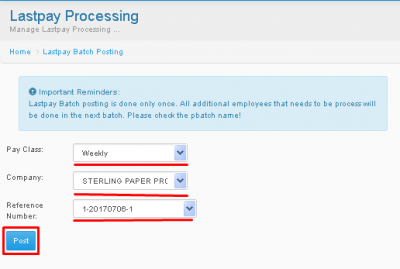
*In Lastpay Batch Posting, just pick the Pay Class, Company, and Reference Number on their respective Combo boxes, then press Post
Last Pay Computation
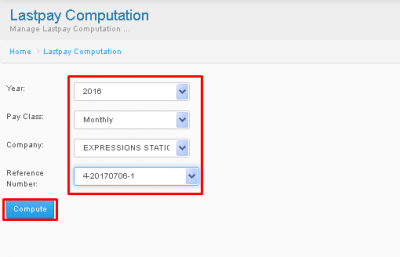
*In Lastpay Computation, just pick the Year, Pay Class, Company, and Reference Number on their respective Combo boxes, then press Compute.
Computed Last Pay
* In Computed Last Pay Module, Just search for separated employee, enter the name on the textbox then press search button.
* Results of the search will appear below, now press the employee number of desired Employee.
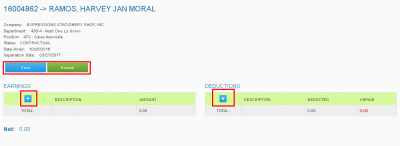
* Now you will be redirected to the Employess information, you may press the [+] button to add Earnings or Deductions or Press save to save changes, and press Refresh to refresh the information.
* Now if you pressed the [+] button, SDSA code and Amount text box will appear now enter the proper SDSA code and Amount Press enter, then press Save to save the changes.
Last Pay Posting
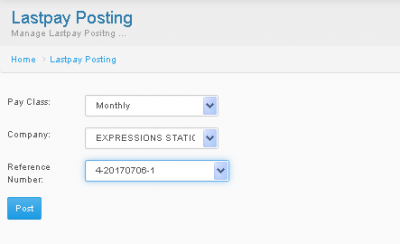
*In Lastpay Posting, just pick the Pay Class, Company, and Reference Number on their respective Combo boxes, then press Post.
Quotabase Payroll Processing
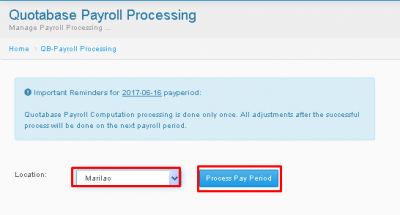
*In Quotabase Payroll Processing, just pick the desired Location then press Process Pay Period.
Pay Period Activation
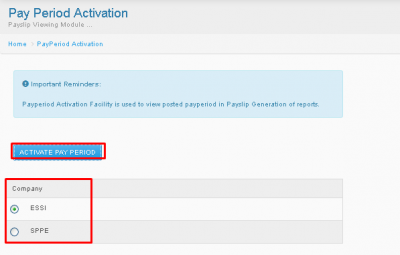
*In Pay Period Activation , just pick the desired Company then press Activate Pay Period.
ETK Password Reset
*In ETK Password Reset , just input the desired Employee number then press Reset Password.
Reference
Main Page > Application Development Team > System Manual > SPGC EPAYROLL
