Difference between revisions of "FILE MANAGER SYSTEM"
From SPGC Document Wiki
| (45 intermediate revisions by 2 users not shown) | |||
| Line 1: | Line 1: | ||
| + | [[Main_Page | Main Page]] > [[Application_Development_Team | Application Development Team]] > [[System_Manual | System Manual]] | ||
* How to '''LOG IN''', in this '''File Manager System'''. | * How to '''LOG IN''', in this '''File Manager System'''. | ||
| Line 7: | Line 8: | ||
* The homepage of '''File Manager''' will display after clicking on '''Login''' button. | * The homepage of '''File Manager''' will display after clicking on '''Login''' button. | ||
| + | |||
| + | |||
[[File:Homepage.jpg|750px|center|]] | [[File:Homepage.jpg|750px|center|]] | ||
| + | |||
| + | |||
| + | * This button allows the user to go back to the main page. | ||
| + | |||
| + | |||
| + | |||
| + | * This button use to '''reload''' or '''refresh''' the system page. | ||
| + | |||
| + | [[File:Reload.jpg|center|]] | ||
| + | |||
| + | |||
| + | * This button allows the user to search a file. By clicking the '''search''' button, '''Website Dialog''' will appear and the user can search a file, just type the filename on the search box then enter. | ||
| + | |||
| + | [[File:Search.jpg|center|]] | ||
| + | |||
| + | [[File:Search1.jpg|center|]] | ||
* On how to create the user a main folder under the '''Directory Tree''' is by clicking the small box then input the name for the main directory or the main folder. Then in the folder name box will appear the name that you inputted. | * On how to create the user a main folder under the '''Directory Tree''' is by clicking the small box then input the name for the main directory or the main folder. Then in the folder name box will appear the name that you inputted. | ||
| − | |||
| + | |||
| + | [[File:Main_directory.jpg|center|]][[File:Appear.jpg|600px||center|]] | ||
* By clicking the '''New file/directory icon''', '''Create New File/Directory''' box will appear. The user is allowed to input the Name. | * By clicking the '''New file/directory icon''', '''Create New File/Directory''' box will appear. The user is allowed to input the Name. | ||
| + | |||
| + | [[File:New_file_directory.jpg|center|]] | ||
* Once you select the File type and clicking the '''Create''' button, it will display under the '''Main Directory''' homepage. And if you want to Cancel it, click '''Cancel''' button. | * Once you select the File type and clicking the '''Create''' button, it will display under the '''Main Directory''' homepage. And if you want to Cancel it, click '''Cancel''' button. | ||
| + | |||
| + | [[File:S.jpg|center|]] | ||
* Then if it is '''Directory type''', It will also display under the '''Main Directory''' homepage but as you can see they have different icon. Then once the user click the '''reload''' or '''refresh''' button, it will go to the '''Directory Tree Main Folder'''. | * Then if it is '''Directory type''', It will also display under the '''Main Directory''' homepage but as you can see they have different icon. Then once the user click the '''reload''' or '''refresh''' button, it will go to the '''Directory Tree Main Folder'''. | ||
| + | |||
| + | [[File:New.jpg|center|]] | ||
| + | |||
| + | * This button allows the user to '''edit''' the file. The file should be formatted as text. | ||
| + | |||
| + | [[File:Edit.jpg|center|]] | ||
| + | |||
| + | |||
| + | * When the user click it, the user can now '''edit''' or '''add''' some information about the file. | ||
| + | |||
| + | [[File:Edit1.jpg|center|]] | ||
* By clicking the '''Copy''' Icon, you should select first the file you want to copy | * By clicking the '''Copy''' Icon, you should select first the file you want to copy | ||
| + | [[File:Copy.jpg|center|]] | ||
* Example you want to copy the file '''S''' to the other folder, Type the name of the folder in the '''Destination''' textbox and click '''Create''' button. | * Example you want to copy the file '''S''' to the other folder, Type the name of the folder in the '''Destination''' textbox and click '''Create''' button. | ||
| − | + | ||
| + | [[File:Copy2.jpg|center|]] | ||
| + | |||
* Then when you click the sub-folder '''AA''' the file that you copied will display. | * Then when you click the sub-folder '''AA''' the file that you copied will display. | ||
| + | [[File:Copy_to_A.jpg|center|400px]] | ||
* By clicking the '''Move''' Icon, you need to select a file first. | * By clicking the '''Move''' Icon, you need to select a file first. | ||
| + | [[File:move.jpg|center]] | ||
* Example you want to move the file '''S''' to the other folder, Type the name of the folder in the '''destination''' text box and click '''Create''' button. | * Example you want to move the file '''S''' to the other folder, Type the name of the folder in the '''destination''' text box and click '''Create''' button. | ||
| + | [[File:BB.jpg|center]] | ||
* Then the file will move to the sub folder named '''BB'''. | * Then the file will move to the sub folder named '''BB'''. | ||
| + | [[File:Move_to_BB.jpg|center|400px]] | ||
* The user are allow to delete the file by clicking '''Delete''' button but the user should select first the file,Then the delete confirmation box will display. | * The user are allow to delete the file by clicking '''Delete''' button but the user should select first the file,Then the delete confirmation box will display. | ||
| + | |||
| + | [[File:delete.jpg|center]] | ||
| + | |||
| + | [[File:Delete_box.jpg|center]] | ||
* Clicking the '''Rename''' icon, the '''Rename Directory''' will display. And the user can rename the file name. Then click '''Save''' button. | * Clicking the '''Rename''' icon, the '''Rename Directory''' will display. And the user can rename the file name. Then click '''Save''' button. | ||
| − | * By clicking the '''About''' icon will let the user view the '''Website Dialog''' box. In this '''Website Dialog''' Box found the '''About''' , '''System Info''' and '''PHp Info''' of the system. | + | |
| + | [[File:rename.jpg|center]] | ||
| + | |||
| + | [[File:RenameB.jpg|center]] | ||
| + | |||
| + | |||
| + | * This button allows the user to '''view''' the selected files. The user should select first the file before clicking the view button. | ||
| + | |||
| + | |||
| + | [[File:view.jpg|center]] | ||
| + | |||
| + | [[File:view1.jpg|center]] | ||
| + | |||
| + | * This button allows the user to '''download''' a file selected. | ||
| + | |||
| + | [[File:11.jpg|center|center]] | ||
| + | |||
| + | * By clicking the '''browse''', the user can now select a program to open the file. | ||
| + | |||
| + | [[File:Download1.jpg|center]] | ||
| + | |||
| + | * This button allows the user to '''upload''' file. | ||
| + | |||
| + | [[File:Upload.jpg|center]] | ||
| + | |||
| + | * It is classified as '''Flashupload''', '''Standardupload''' and '''Transfer from another'''. Under the standardupload, the user now can browse a file, then click open and save. | ||
| + | |||
| + | |||
| + | [[File:Upload1.jpg|center]] [[File:Upload2.jpg|center]] | ||
| + | |||
| + | * This buttton is '''Archive''' button, by clicking the '''file''', it will move to other directory you type , then check the download box and click create. Then it will appear on the the selected directory and add .'''zip''' in the file you selected. | ||
| + | |||
| + | |||
| + | [[File:Archive.jpg|center]] | ||
| + | |||
| + | [[File:Archive1.jpg|center]] | ||
| + | |||
| + | [[File:Archive2.jpg|center]] | ||
| + | |||
| + | |||
| + | * The file should be formatted as .'''zip''' so that it can be extract the file, The '''Extract Archive''' dialog box will appear so the user can confirm it. | ||
| + | |||
| + | |||
| + | [[File:extract.jpg|center]] | ||
| + | |||
| + | [[File:extract1.jpg|center]] | ||
| + | |||
| + | |||
| + | * By clicking the '''About''' icon will let the user view the '''Website Dialog''' box. In this '''Website Dialog''' Box found the '''About''' , '''System Info''' and '''PHp Info''' of the system. | ||
| + | |||
| + | [[File:info.jpg|center]] | ||
| + | |||
| + | [[File:log_in.jpg|center]] | ||
| + | |||
| + | [[File:system info.jpg|center]] | ||
| + | |||
| + | [[File:php info.jpg|center]] | ||
* On the '''Admin''' icon the user can change the Password; | * On the '''Admin''' icon the user can change the Password; | ||
| + | [[File:administration.jpg|center]] | ||
| + | |||
| + | [[File:change password.jpg|center]] | ||
* And can also '''Add''' , '''Edit''' and '''Remove''' users. | * And can also '''Add''' , '''Edit''' and '''Remove''' users. | ||
| + | |||
| + | [[File:users.jpg|center]] | ||
| + | |||
| + | * By Adding a user in '''Administration''', input the '''username''' , '''confirmation password''' and re-type '''confirmation new password'''. Type the '''Home Directory''' and '''Home URL''' . For the '''Show hidden items''' and '''Active''' select '''‘Yes’''', for the '''Permissions''' select '''View only'''. Then click '''Save''' button. | ||
| − | + | [[File:adding.jpg|center]] | |
* For '''Editing''', the user can edit the username and also the password if he/she want just click the textbox and type, then check the '''Change password''' text box. Click '''Save''' button. | * For '''Editing''', the user can edit the username and also the password if he/she want just click the textbox and type, then check the '''Change password''' text box. Click '''Save''' button. | ||
| + | |||
| + | [[File:editing.jpg|center]] | ||
* By '''Removing''', the user should select first she/he wants to remove. Click '''Remove''' button then remove or delete confirmation box will display. | * By '''Removing''', the user should select first she/he wants to remove. Click '''Remove''' button then remove or delete confirmation box will display. | ||
| + | |||
| + | [[File:removing.jpg|center]] | ||
| + | |||
| + | [[File:removing confirmation.jpg|center]] | ||
* '''Logout''' button allows the user to logout in the system. | * '''Logout''' button allows the user to logout in the system. | ||
| + | |||
| + | [[File:logout button.jpg|center]] | ||
| + | |||
| + | |||
| + | == '''Reference''' == | ||
| + | [[Media:File_Manager_Manual.doc|File_Manager_Manual document]] | ||
| + | |||
| + | |||
| + | [[Main_Page | Main Page]] > [[Application_Development_Team | Application Development Team]] > [[System_Manual | System Manual]] | ||
Latest revision as of 09:42, 17 April 2023
Main Page > Application Development Team > System Manual
- How to LOG IN, in this File Manager System.
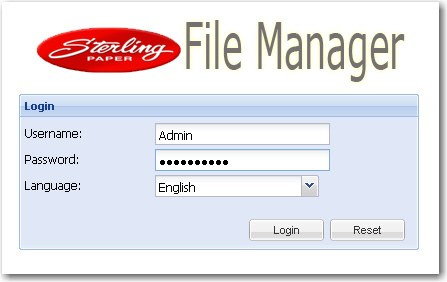
- First you must input the Username and Password. Then you can select Language by clicking the language combo box and click on Login button.
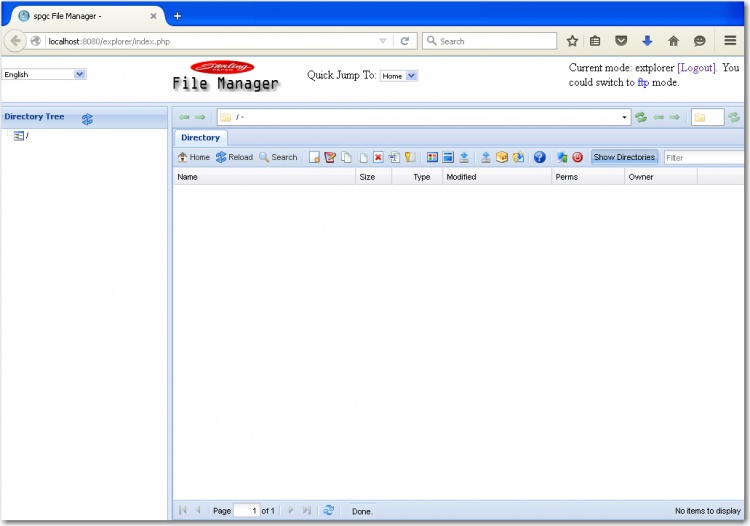
- The homepage of File Manager will display after clicking on Login button.
- This button allows the user to go back to the main page.
- This button use to reload or refresh the system page.
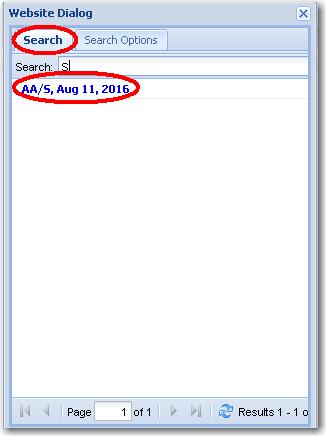
- This button allows the user to search a file. By clicking the search button, Website Dialog will appear and the user can search a file, just type the filename on the search box then enter.
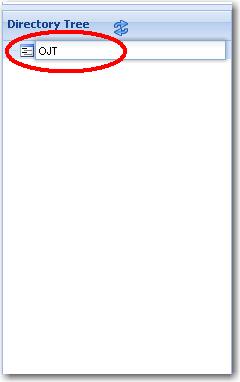
- On how to create the user a main folder under the Directory Tree is by clicking the small box then input the name for the main directory or the main folder. Then in the folder name box will appear the name that you inputted.
- By clicking the New file/directory icon, Create New File/Directory box will appear. The user is allowed to input the Name.
- Once you select the File type and clicking the Create button, it will display under the Main Directory homepage. And if you want to Cancel it, click Cancel button.
- Then if it is Directory type, It will also display under the Main Directory homepage but as you can see they have different icon. Then once the user click the reload or refresh button, it will go to the Directory Tree Main Folder.
- This button allows the user to edit the file. The file should be formatted as text.
- When the user click it, the user can now edit or add some information about the file.
- By clicking the Copy Icon, you should select first the file you want to copy
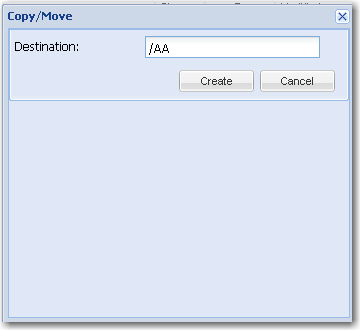
- Example you want to copy the file S to the other folder, Type the name of the folder in the Destination textbox and click Create button.
- Then when you click the sub-folder AA the file that you copied will display.
- By clicking the Move Icon, you need to select a file first.
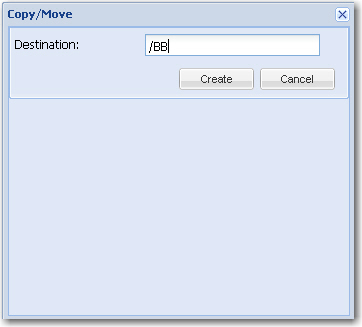
- Example you want to move the file S to the other folder, Type the name of the folder in the destination text box and click Create button.
- Then the file will move to the sub folder named BB.
- The user are allow to delete the file by clicking Delete button but the user should select first the file,Then the delete confirmation box will display.
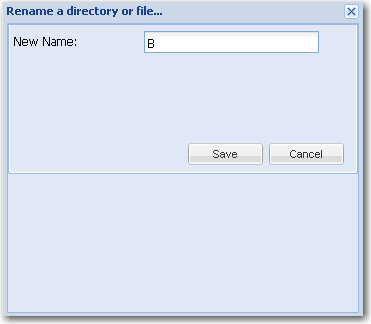
- Clicking the Rename icon, the Rename Directory will display. And the user can rename the file name. Then click Save button.
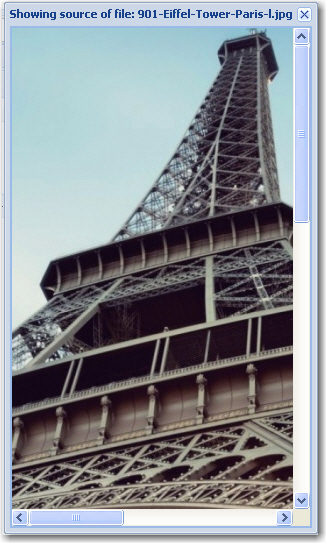
- This button allows the user to view the selected files. The user should select first the file before clicking the view button.
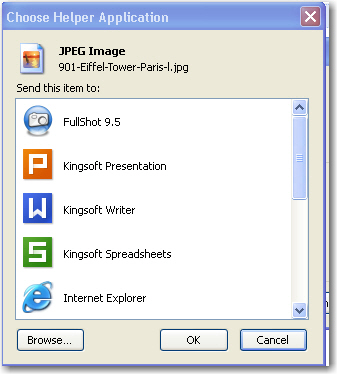
- This button allows the user to download a file selected.
- By clicking the browse, the user can now select a program to open the file.
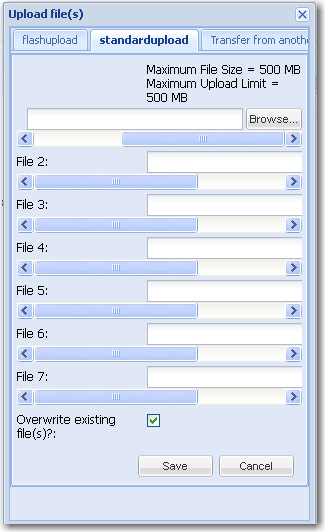
- This button allows the user to upload file.
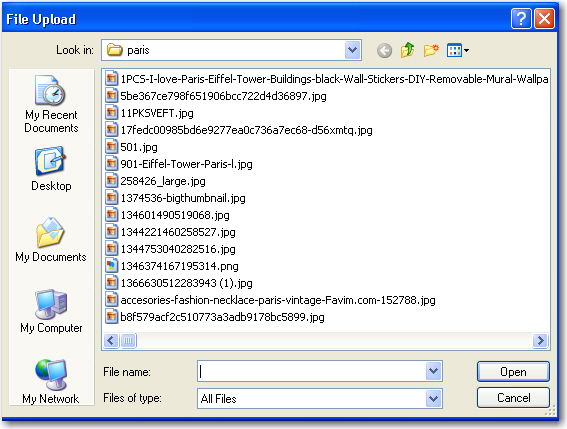
- It is classified as Flashupload, Standardupload and Transfer from another. Under the standardupload, the user now can browse a file, then click open and save.
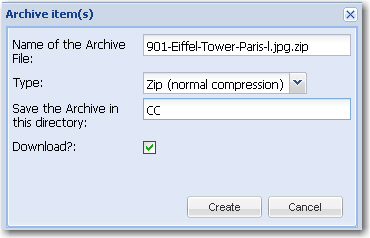
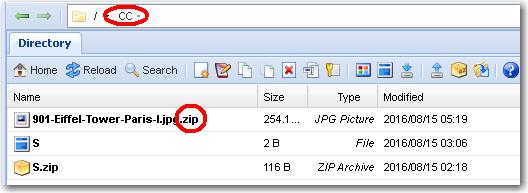
- This buttton is Archive button, by clicking the file, it will move to other directory you type , then check the download box and click create. Then it will appear on the the selected directory and add .zip in the file you selected.
- The file should be formatted as .zip so that it can be extract the file, The Extract Archive dialog box will appear so the user can confirm it.
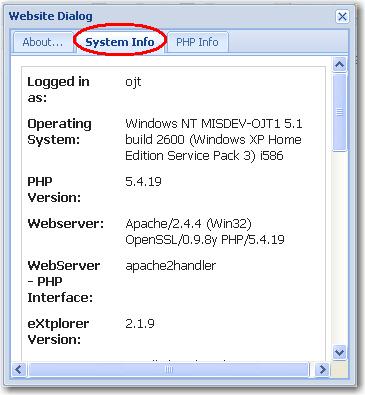
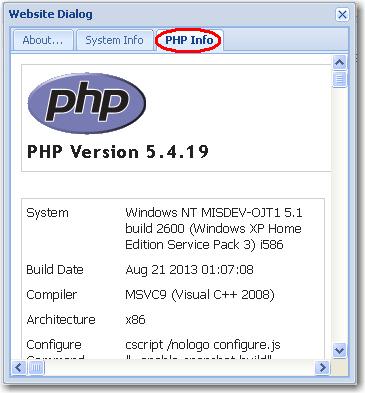
- By clicking the About icon will let the user view the Website Dialog box. In this Website Dialog Box found the About , System Info and PHp Info of the system.
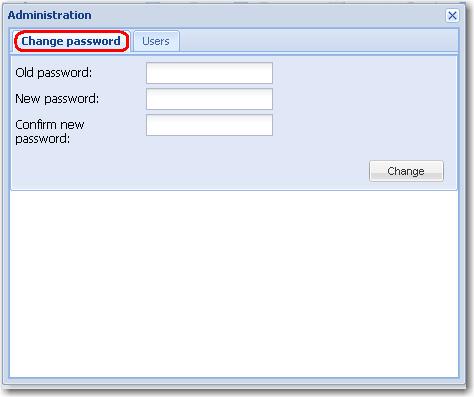
- On the Admin icon the user can change the Password;
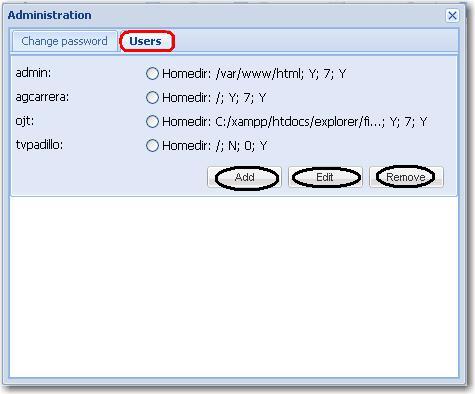
- And can also Add , Edit and Remove users.
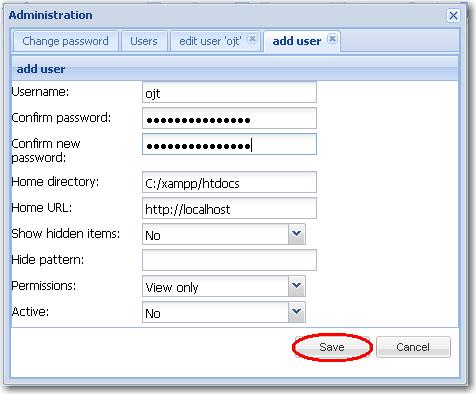
- By Adding a user in Administration, input the username , confirmation password and re-type confirmation new password. Type the Home Directory and Home URL . For the Show hidden items and Active select ‘Yes’, for the Permissions select View only. Then click Save button.
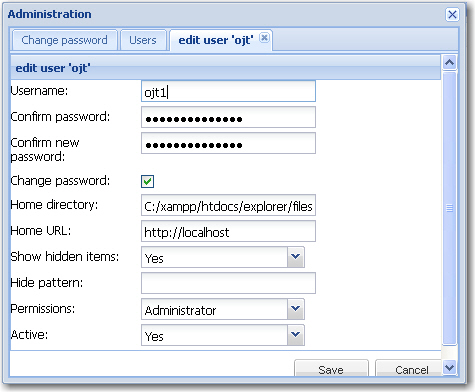
- For Editing, the user can edit the username and also the password if he/she want just click the textbox and type, then check the Change password text box. Click Save button.
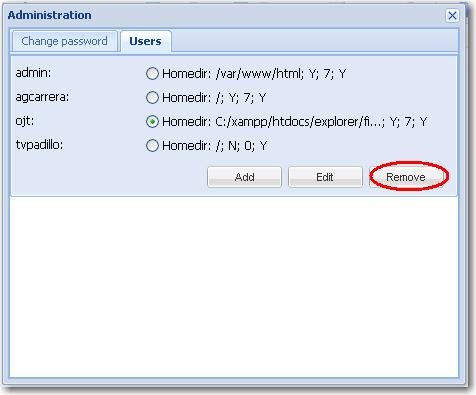
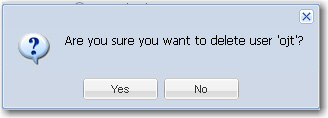
- By Removing, the user should select first she/he wants to remove. Click Remove button then remove or delete confirmation box will display.
- Logout button allows the user to logout in the system.
