Difference between revisions of "IPOSware MANUAL"
From SPGC Document Wiki
| Line 71: | Line 71: | ||
| − | [[File:05.png|550px|center]] | + | [[File:05.png|550px|center]] |
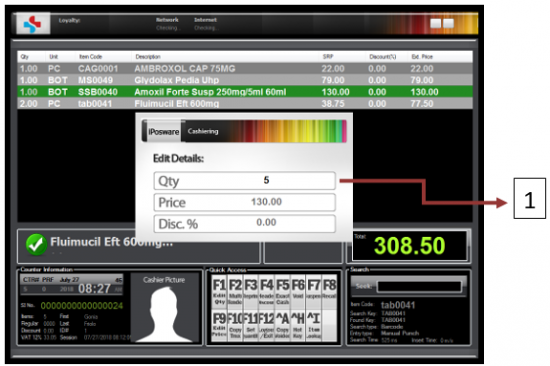
'''Figure 3. Edit Quantity''' | '''Figure 3. Edit Quantity''' | ||
| Line 80: | Line 80: | ||
*Quick Access: F1 | *Quick Access: F1 | ||
*Allows cashier can edit the quantity of the product. | *Allows cashier can edit the quantity of the product. | ||
| + | |} | ||
| + | |||
| + | |||
| + | [[File:06.png|550px|center]] | ||
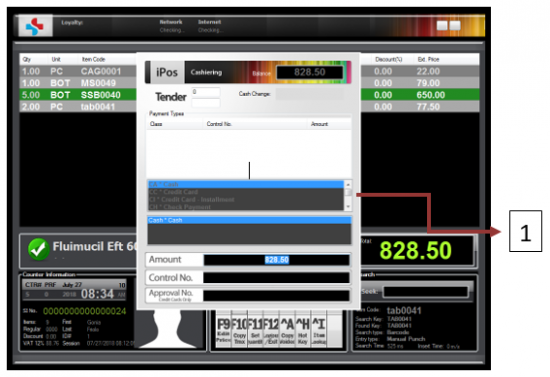
| + | '''Figure 3.3 Multi-Tender''' | ||
| + | |||
| + | |||
| + | {| class="wikitable" style = "text-align:center; margin: 0 auto;" | ||
| + | | 1 | ||
| + | | Multi-Tender | ||
| + | | style="text-align:left;" | | ||
| + | *Quick Access: F2 | ||
| + | *This field allows the cashier to enter the tendered amount of the customer. | ||
| + | *Avoid selecting cash first when doing the multi-tender. E.g. you may select credit card first before cash. | ||
| + | *You cannot select cash after selecting a cash. In other words, you cannot tender 2 cash in one transaction. E.g. the customer should pay P500, he/she can pay it in whole but never in two cash tender like P250 on first cash tender and P250 on second cash tender. | ||
|} | |} | ||
Revision as of 07:53, 30 January 2020
Main Page > Application Development Team > System Manual
IPOSWARE USER GUIDE
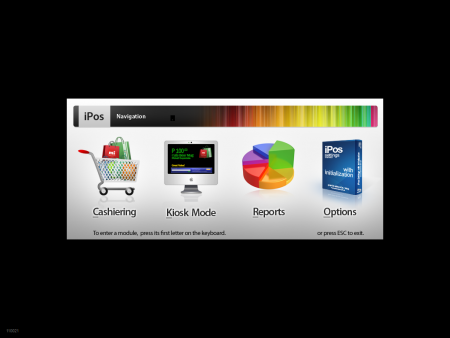
Figure 1. Main Screen
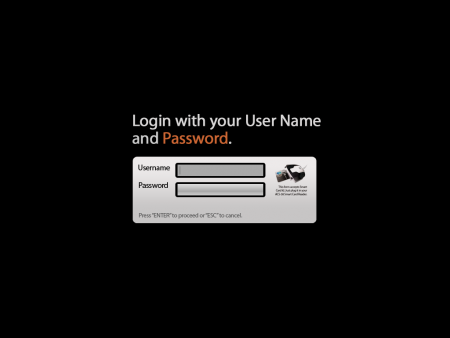
Figure 2. Login Screen for Cashiering
| 1 | Username Field | This fields allows the user enter their username |
| 2 | Password Field | This field allows the user to enter their password |
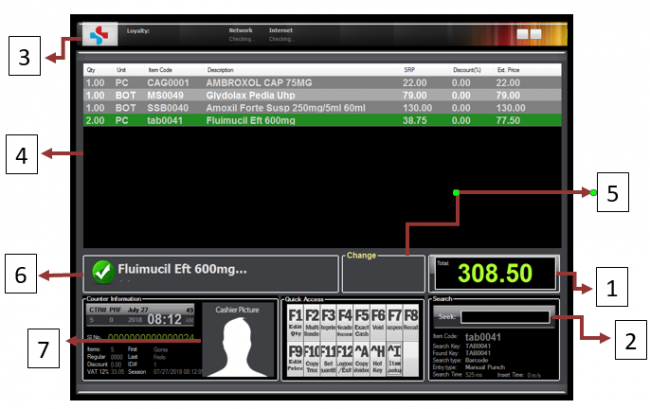
Figure 3. Cashiering
| 1 | Total | Shows the total price of the products. |
| 2 | Search | This text field allows the cashier to enter the product manually. |
| 3 | Company Logo | Shows the company logo. |
| 4 | Product List | Shows the product list. |
| 5 | Change | Shows the Customer’s change. |
| 6 | Product Name | Shows the product name. |
| 7 | Cashier Picture | Shows the Cashier picture. |
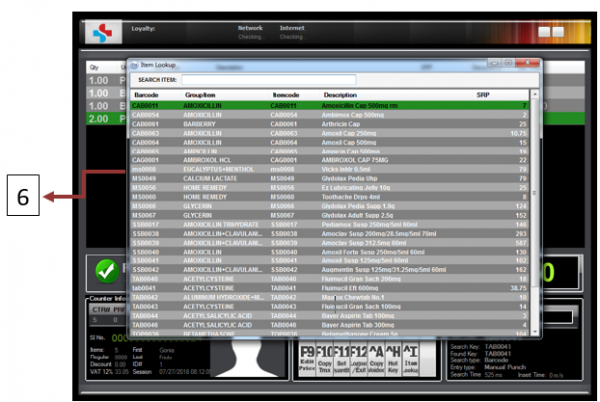
Figure 3.1 Item Lookup
| 1 | Item Lookup |
|
Figure 3. Edit Quantity
| 1 | Edit Quantity |
|
Figure 3.3 Multi-Tender
| 1 | Multi-Tender |
|
