Difference between revisions of "EMPLOYEE CREATION MANUAL"
From SPGC Document Wiki
| Line 65: | Line 65: | ||
'''The Display all Button''' | '''The Display all Button''' | ||
| − | '''*''' In SPGC Home Page, Click '''Employee''' In the Navigation Bar. | + | '''*''' In SPGC Home Page, Click '''Employee''' In the Navigation Bar. |
[[File:Home.png|700px|center]] | [[File:Home.png|700px|center]] | ||
| Line 96: | Line 96: | ||
| − | + | ||
| + | '''Adding Employee''' | ||
| + | |||
| + | |||
| + | '''*''' In SPGC Home Page, Click '''Employee''' In the Navigation Bar. | ||
| + | |||
| + | [[File:Home.png|700px|center]] | ||
| + | |||
| + | '''*''' After clicking '''Employee''' a Sub - Menu will appear. It contains; | ||
| + | Employee Master, Confirm Separated Employee, Separated Employee, | ||
| + | Remote EE Creation Posting inq., TK Biometrics Attlogs. | ||
| + | |||
| + | [[File:Submenu.png|700px|center]] | ||
| + | |||
| + | '''*''' In the Sub - menu, click Employee Master. | ||
| + | |||
| + | [[File:Empclick.png|700px|center]] | ||
| + | |||
| + | '''*''' You will now be redirected to the Employee Master Page, Which contains a Search Textbox, a Search, Display All, and Add Employee button. | ||
| + | |||
| + | [[File:Empmaster.png|700px|center]] | ||
| + | |||
| + | '''*'''You can now see the Add Employee button. Now click the button. | ||
| + | |||
| + | [[File:Addbttn.png|700px|center]] | ||
| + | |||
| + | '''*'''After clicking you will now be redirected to Employee Creation page. | ||
| + | |||
| + | [[File:Empcreate.png|700px|center]] | ||
| + | |||
| + | '''*'''You may now fill out the required fields(Textboxes with star symbol). | ||
| + | |||
| + | [[File:Star.png|700px|center]] | ||
| + | |||
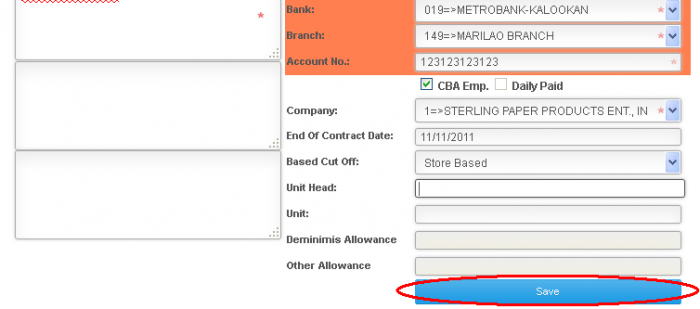
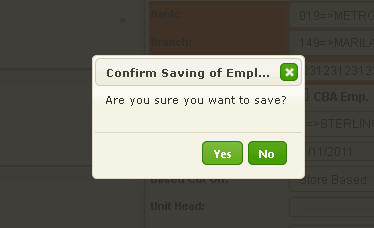
| + | '''*'''After Filling out the Required Fields, Click Save on the lower part. | ||
| + | |||
| + | [[File:Fill.png|700px|center]] [[File:Confirm.png|700px|center]] | ||
| + | |||
| + | |||
| + | |||
Revision as of 08:51, 21 June 2017
Main Page > Application Development Team > System Manual > SPGC EPAYROLL >PERSONAL MANAGEMENT SYSTEM
Navigating to Employee Master
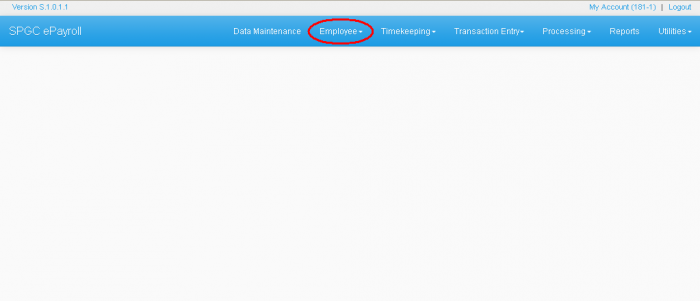
* In SPGC Home Page, Click Employee In the Navigation Bar.
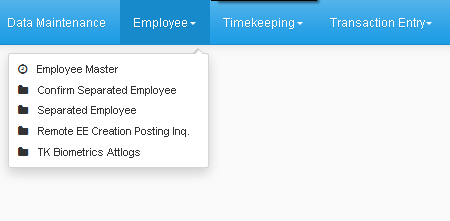
  * After clicking Employee a Sub - Menu will appear. It contains;
  Employee Master, Confirm Separated Employee, Separated Employee,
  Remote EE Creation Posting inq., TK Biometrics Attlogs.
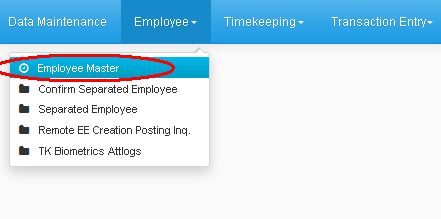
* In the Sub - menu, click Employee Master.
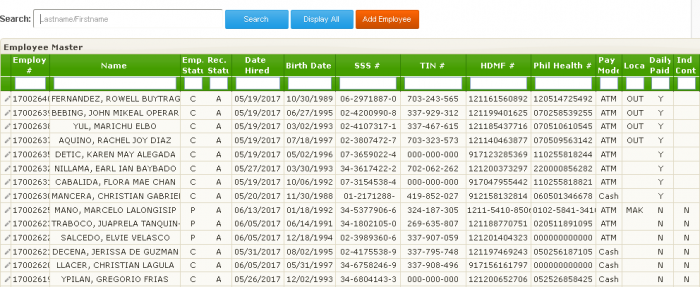
* You will now be redirected to the Employee Master Page, Which contains a Search Textbox, a Search, Display All, and Add Employee button.
Searching in Employee Master
* To search an Employee, you may enter in the Search textbox their Employee No., First Name, Last Name, their Complete Name(Lastname/Firstname), or any Group of No. or Letters resembling their Employee No. or Name and then click the Search button.
* After clicking, Results will be displayed below, in the Employee Master List box.
* You may also arrange them according to their Emp no., Name, Emp. Status, Rec. Status, Date hired, Birth Date, SSS #., TIN#, HDMF, Philhealth, Pay Mode, Location, Daily Paid, Ind Contractor, they will be arranged in ascending and descending order.
* You may also add additional information in the boxes above, to make the results more specific.
Editing Info. in Employee Master
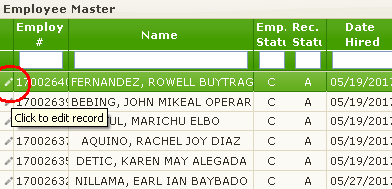
* You can edit or update an Employee information by clicking the pencil logo on the farther left side.
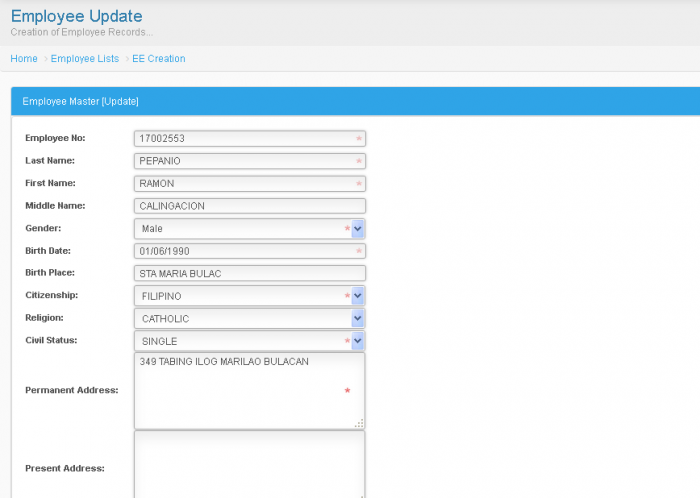
* After clicking the Pencil logo, you will be redirected to Employee Update Page.
*On this page you may edit the employee's complete information like; Emp. no., Last/First/Middle name, Gender, Address, Date Hired, Bank, Account no., ETC., Textbox that has a star symbol are fields that are required to be filled before you can save.
*After Editing or Updating you may click Save Button at the bottom for the changes to be saved.
The Display all Button
* In SPGC Home Page, Click Employee In the Navigation Bar.
  * After clicking Employee a Sub - Menu will appear. It contains;
  Employee Master, Confirm Separated Employee, Separated Employee,
  Remote EE Creation Posting inq., TK Biometrics Attlogs.
* In the Sub - menu, click Employee Master.
* You will now be redirected to the Employee Master Page, Which contains a Search Textbox, a Search, Display All, and Add Employee button.
*You will now be able to see the Display all Button.
*By clicking the button, the Employee Master list box will appear with all the list of Employees and their information.
* The whole list will only display 30 of all employee's, you can navigate the Employee Master list, by clicking the arrows below the list and you can refresh for updates of the Employee's by clicking the Refresh button on the bottom left side.
Adding Employee
* In SPGC Home Page, Click Employee In the Navigation Bar.
  * After clicking Employee a Sub - Menu will appear. It contains;
  Employee Master, Confirm Separated Employee, Separated Employee,
  Remote EE Creation Posting inq., TK Biometrics Attlogs.
* In the Sub - menu, click Employee Master.
* You will now be redirected to the Employee Master Page, Which contains a Search Textbox, a Search, Display All, and Add Employee button.
*You can now see the Add Employee button. Now click the button.
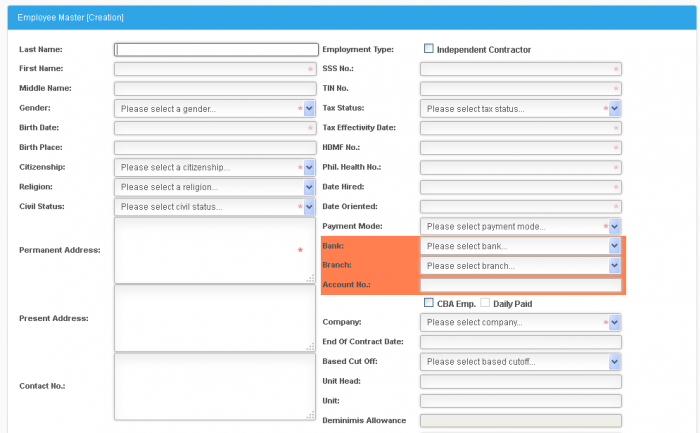
*After clicking you will now be redirected to Employee Creation page.
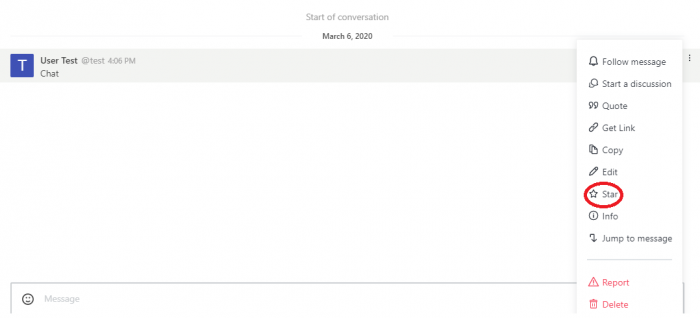
*You may now fill out the required fields(Textboxes with star symbol).
*After Filling out the Required Fields, Click Save on the lower part.
Main Page > Application Development Team > System Manual > SPGC EPAYROLL >PERSONAL MANAGEMENT SYSTEM
